Rembrandt lighting is one of my ideal studio lighting patterns. It creates a beautifully dramatic, moody feel and is not complicated to setup.
You do not need a lot of professional studio lights to achieve Rembrandt lighting.
For portrait photographers, there are a few main classic lighting setups to pick from. Many of them can be created in their original form with a single light source, such as a Speedlight. Rembrandt lighting is an excellent setup for beginners and those who are working with limited lighting equipment.
Rembrandt lighting is one of the best and finest lighting techniques used by portrait photographers. In this tutorial, I will show & explain to you how to set up your studio so you can start taking outstanding Rembrandt light portraits. Follow along as we will learn some art history and Rembrandt lighting setup.
This post may include affiliate links. Please read our disclosure policy. [003]
WHAT IS REMBRANDT LIGHTING?
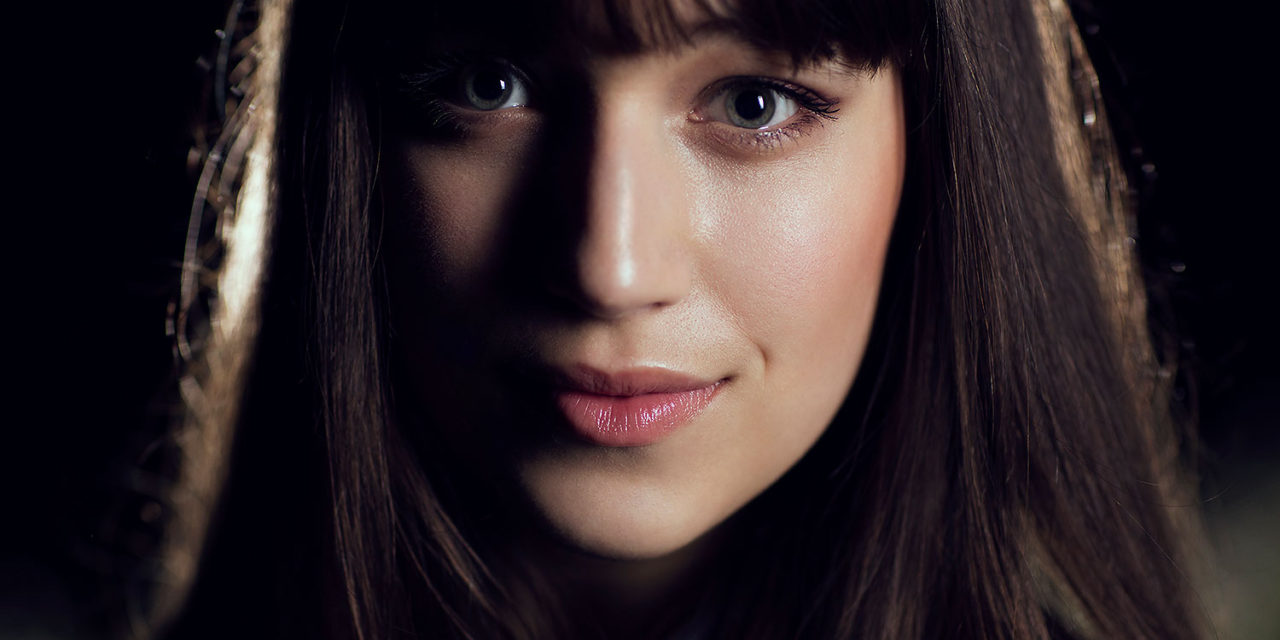
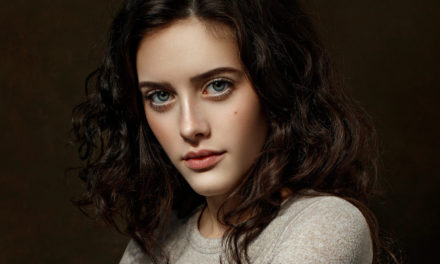
Rembrandt lighting is a studio portrait-lighting technique where a small inverted triangle of light is visible under the subject’s eye.
The type of lighting gear that you use for the portrait isn’t vital. Just keep in mind that it needs to be a light source that you can control.
Natural light isn’t easy to manage as the primary light source; that’s why it’s not used as often.
You can take portraits in the studio with Speedlight and minimal equipment and achieve correct Rembrandt lighting. With a single light source and possibly a reflector, you can get the result.
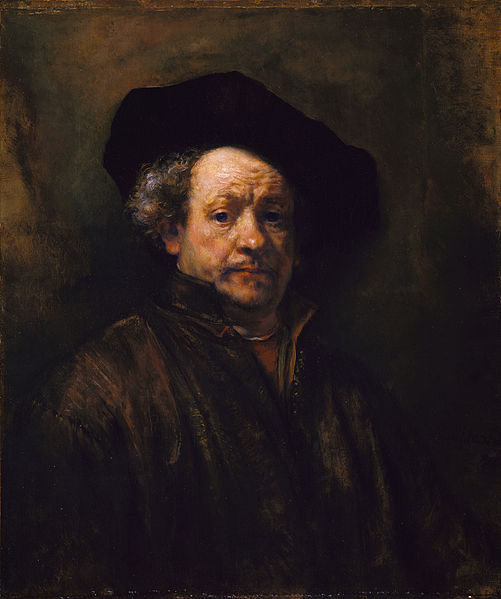
Rembrandt lighting got its name from the famous Dutch painter Rembrandt Harmenszoon van Rijn. He was a master of the chiaroscuro technique. He often used this type of light in his paintings, especially in his self-portraits.
If you look through Rembrandt’s paintings, you will notice many of them have something in common. Many portraits have a small inverted triangle of light under the subject’s eye on the shadowed side. This type of split light setup is called Rembrandt lighting.
HOW TO MAKE THE REMBRANDT LIGHTING SETUP
When you are recreating a particular lighting setup, keep in mind that the style is determined by the position of the lights in relation to the model. Rembrandt lighting requires the key light to be placed on the side of the model’s face.
To produce the Rembrandt lighting setup, you will need a light source, a model, and a reflector – which is optional.
When creating a Rembrandt lighting setup, it is best to work with studio lights that include a so-called modeling light. This is very helpful as it allows you to have a live preview of the shadows cast on the model’s face.
You may use a reflector on the opposite side of the subject if you are trying to soften the shadows a bit. Otherwise, the portrait will appear with a dramatic feel.
If you have a studio light, that’s perfect! If not, a standard flashlight or house lamp will help you to achieve a Rembrandt lighting setup.
Don’t worry if you don’t own a reflector, find yourself a fitting substitute like a piece of cardboard covered in foil.
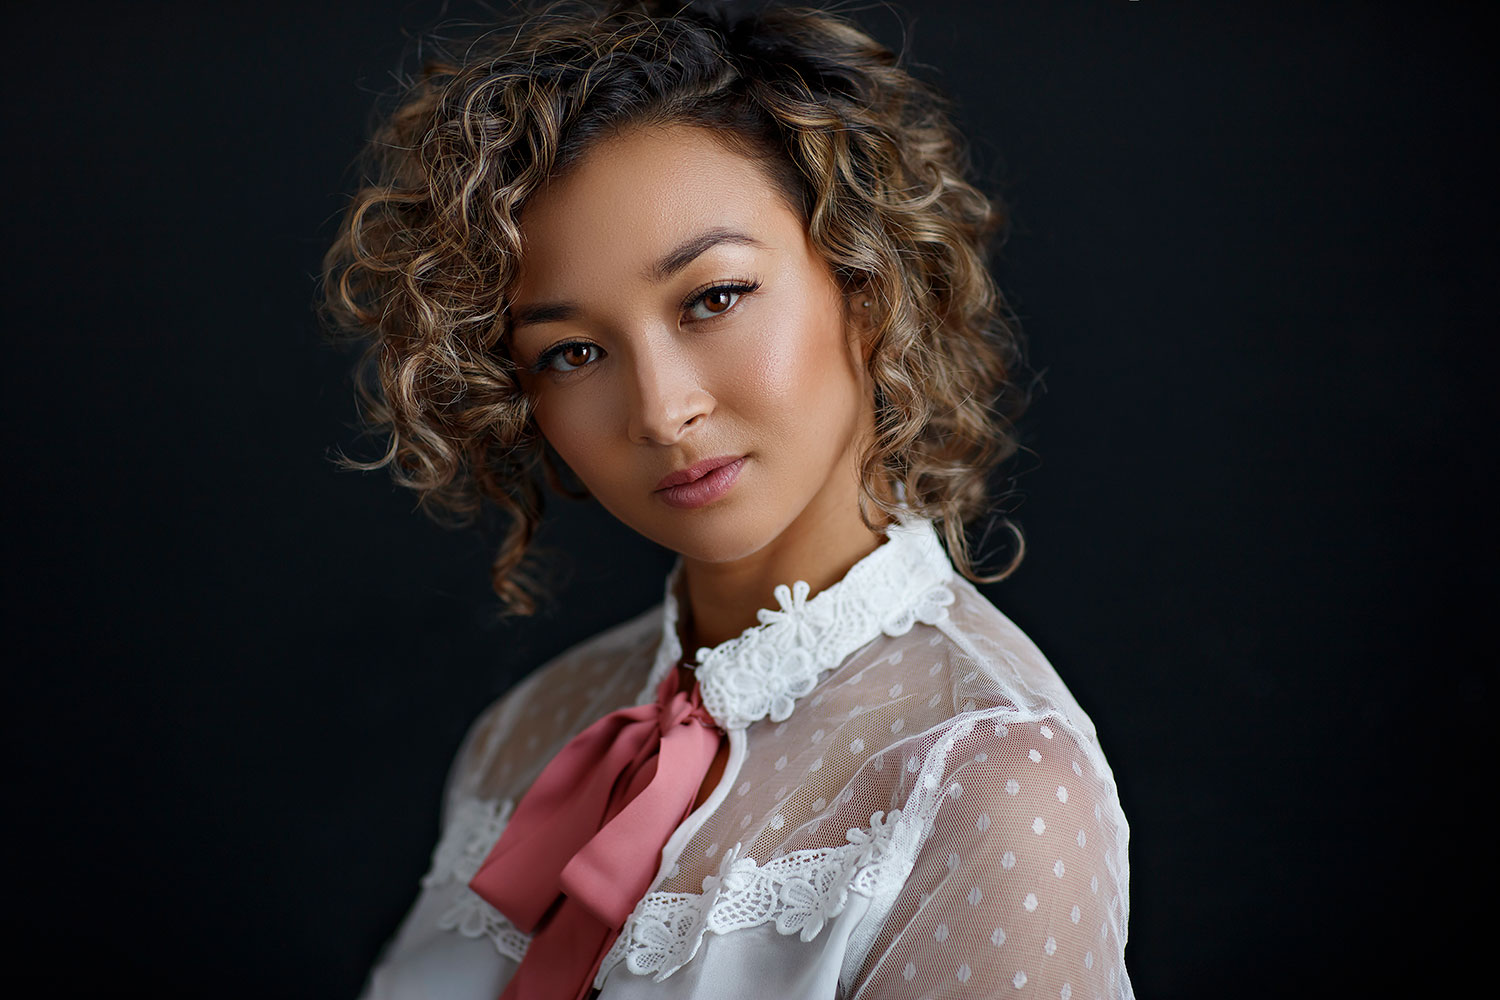
Camera: Canon EOS 5DS R | Lens: Canon EF 50mm f/1.2 L USM Lens
Window Light | f/1.6, 1/100s, ISO 320 | Photo by © Sergey Bidun
HOW TO POSITION THE KEY LIGHT IN REMBRANDT LIGHTING
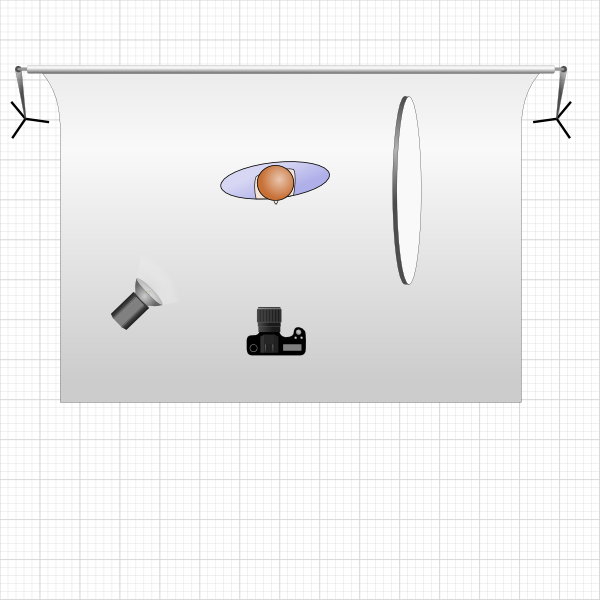
Once you have all the components for the Rembrandt lighting setup, we are ready to start setting up the diagram.
Here’s a basic Rembrandt lighting illustration of the structure. You can use it as a guide to set up at your own studio space.
- Step 1: First, place your light source (key light) at a 45-degree angle with respect to the model’s nose.
- Step 2: Make sure the light is just above the subject’s head, angled down. Don’t be afraid to make adjustments to the light by raising or lowering it as needed throughout the shoot.
- Step 3: Adjust the light position, height, and orientation. A triangle of light should be visible under the model’s eye opposite to the side where the key light is.
- Step 4: If using a reflector, position it on the opposite side of the subject at about the same height as the light source.
- Step 5: The photographer’s position is between the reflector and the light source. The subject should be directly in front of you, but facing a bit towards the light source.
If your light source happens to be a strobe, you will have to take a few test shots to work out the exact positioning of the light. Once you have the basic setup mastered, you can experiment a bit. Try adding different background lighting to get more impact to your Rembrandt lighting portraits.
When working with this studio lighting setup with your subject, don’t forget other important components.
To achieve striking portraits, it’s important to guide and direct posing and facial expressions. For more ideas on model posing, read our Posing Tips for Women Photography post.
BEST LOCATION FOR REMBRANDT LIGHTING
So what is the best location setting to shoot Rembrandt lighting in? A studio setup makes it easier to get rid of unwanted environmental light.
Even though studios are your top choice, not everyone has access to one.
If you don’t have access to a studio, look for a moderately dark location you can shoot in. I say somewhat dark because you don’t want to have to try to overpower a room full of ambient light.
You can shoot from home, just find a room that has a minimal number of windows. Shooting in a darker place will make things a lot easier for you. Especially if you’re still learning the basics of Rembrandt lighting.
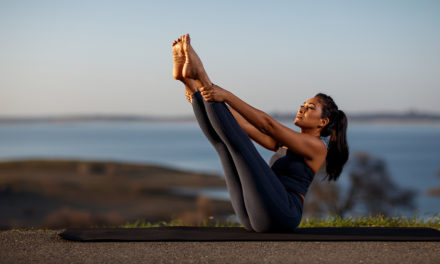
Rembrandt lighting can be achieved outdoors with natural light too, but you have to master the essential characteristics of it first. Once you get better at seeing the light, you will be able to get stunning portraits outdoors as well.
You can read more about Outdoor Natural Lighting in my previous post.
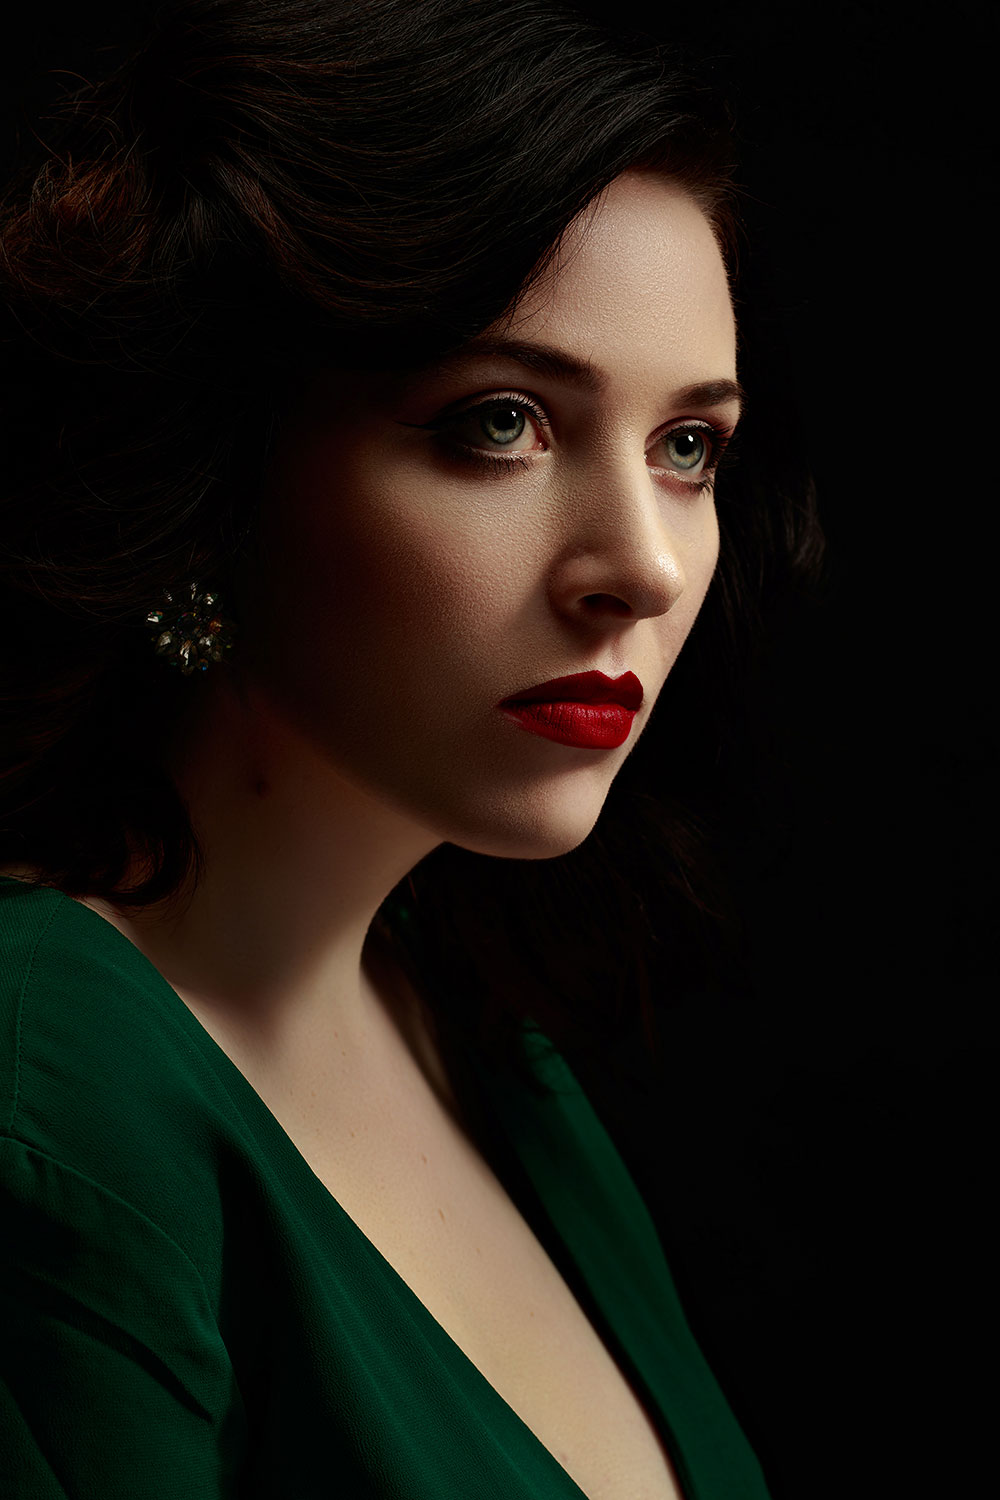
Camera: Canon EOS 5DS R | Lens: Canon EF 85mm f1.2L II USM
Window Light | f/2.5, 1/200s, ISO 250 | Photo by © Sergey Bidun
HOW TO POSITION THE CAMERA
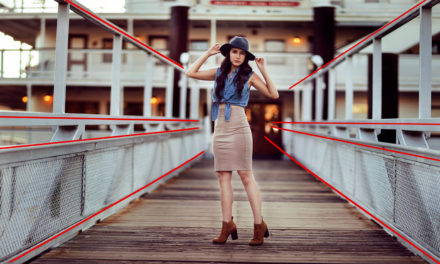
Many wonder if the angle from which you photograph your subject affects the type of light that will appear. The answer is no; it does not. But it will change the image’s mood. That’s because it will influence whether you are using a broad light or a short light.
Broad light implies that the side of the face highlighted by the key light is close to the camera. Short light suggests that the side of the face illuminated by the key light is far from the camera.
Practice this with your camera to see the effect of moving the camera in regard to the model. The different types of light we can get from moving camera left to right: short, split, and broad light.
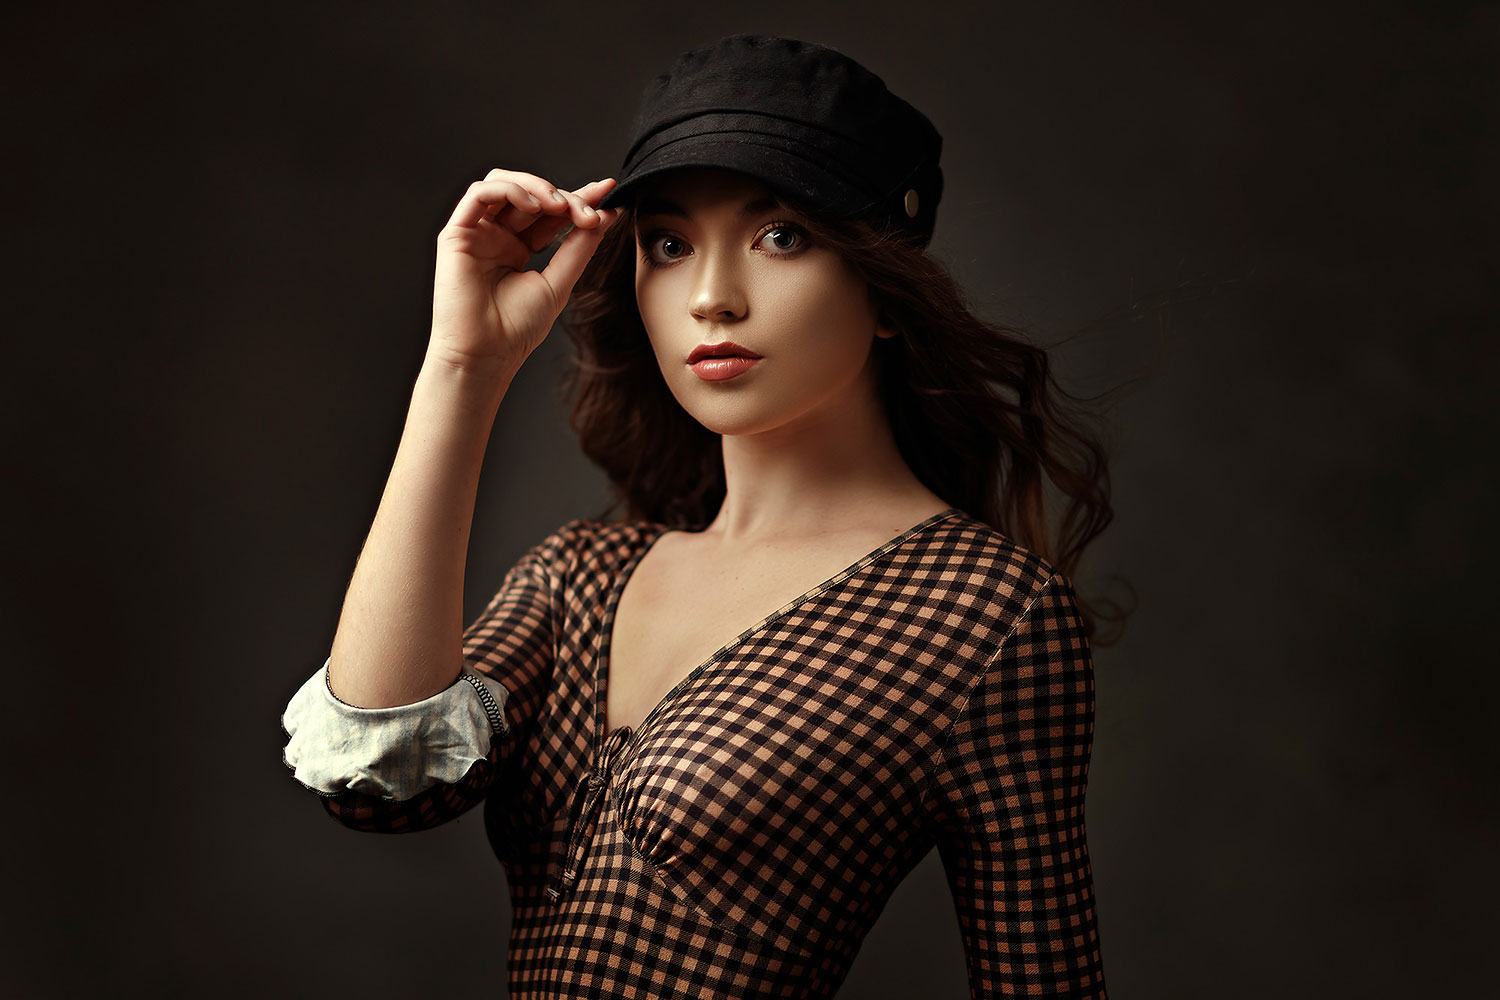
Camera: Canon EOS 5DS R | Lens: Canon EF 85mm f1.2L II USM
Studio Light | f/10, 1/200s, ISO 50 | Photo by © Sergey Bidun
If using a reflector for your portraits, try putting reflector closer or farther from the subject, to see the difference it creates.
You may also get more creative and try less traditional angles. Portraits with Rembrandt lighting are used both in female and male photography, so try shooting from below to give to your subject some power.
When photographing your model from slightly below, you will generally empower your subject.
Learn from our article how different lighting setups may be used in female portrait photography.
HOW TO IMPROVE BASIC REMBRANDT LIGHTING SETUP
The most basic Rembrandt lighting setup consists of a single Speedlight and no modifiers. It will create a hard light if used without a reflector. This will result in contrasted images that can make great male portraits.
Since the key light creates the pattern of the shadow, you may use a fill light. Add either an additional speed light, a reflector, or a white v-flat to bounce back some light. Use these tools to fill the shadows for a softer and more flattering setup.
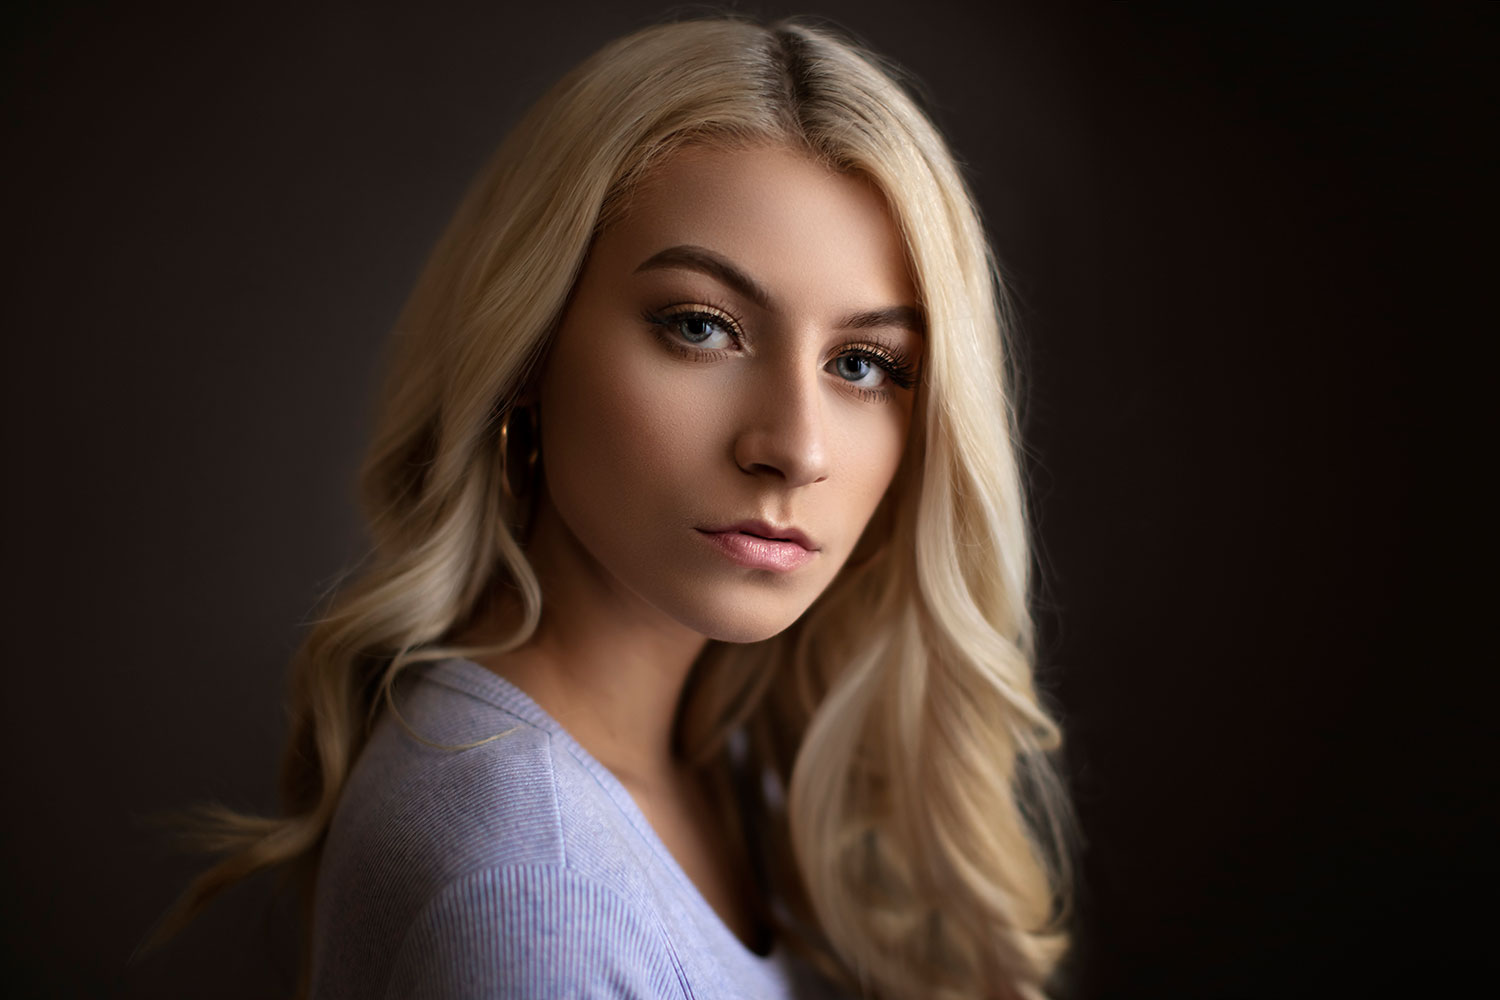
Using a reflector will soften the shadows, and this lighting is best for women portraits. A softer setup is more pleasant while it retains the Rembrandt lighting quality.
A third light source coming from behind the model and pointed at the background will act as a separation light. This will allow you to better separate your model from the background.
The more advanced lighting setups described above are more applicable to professional photographers who shoot in the studio. You may use these tips once you master the Rembrandt lighting and other light setups such as Butterfly lighting or Split lighting.
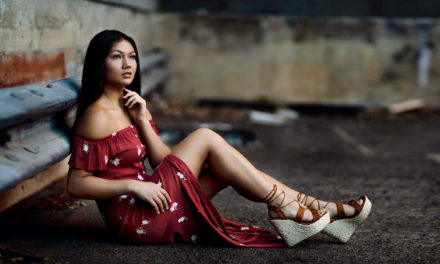
Camera: Canon EOS 5DS R | Lens: Canon EF 85mm f1.2L II USM
f/1.8, 1/100s, ISO 125 | Photo by © Sergey Bidun
Light: Profoto B1 500 AirTTL System
CONCLUSION
Rembrandt lighting is a classic lighting setup that is simple to use to add attention to your low key portraiture. This lighting beautifully suits both male and female portraits. Be creative and soften the contrast with a fill light for a more unique perspective.
Rembrandt lighting requires you to take the portrait at a specific angle, with the light falling on your model from the right direction.
Do you see how the shadow triangle doesn’t extend below the subject’s nose but stops just at the tip of it? This is very crucial. To be technically correct, you don’t want the triangle to be any longer than that.
When you’re taking your test shots, be sure to adjust your lighting as needed, so the triangle falls just short of the nose-tip level. For a perfect Rembrandt lighting portrait, get the triangle just right.
The tips discussed in this article are our opinions and strategies that work for our Sacramento portrait photography. You don’t have to agree to all of the information above, but this is what has worked for our portraiture at Bidun Studio Photography for many years.
I hope you found this article and our tips useful and can implement some of these strategies into your photography.
IF YOU FOUND THIS POST HELPFUL AND INFORMATIVE, PLEASE SHARE IT IN YOUR SOCIAL MEDIA.
Photographer: Sergey Bidun
Written by Maria Bidun