Leading lines play a significant role in all genres of photography. It is one of the most common tools that photographers use when composing their images. Did you know that with the help of this composition technique, the image will appear more interesting and dynamic?
The leading lines technique can be applied to different genres of photography and many visual arts. Leading lines help to create a balanced image and draw the viewer’s eye to a skillfully placed subject.
Let’s go deeper into defining what the leading lines in photography really means, and how we can use this composition technique to improve photography.
This post may include affiliate links. Please read our disclosure policy. [049]
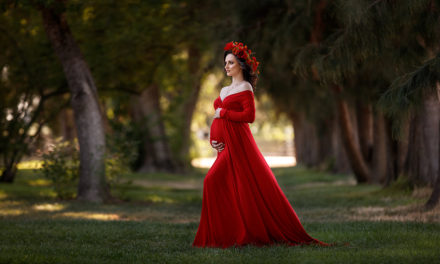
Camera: Canon EOS 5Ds R | Lens: Canon EF17-40mm F/4L USM
Natural Light | f/16, 30sec, ISO 50| |Lee ND Filters
Photo by © Sergey Bidun
WHAT ARE THE LEADING LINES?
The leading lines technique is using elements in your environment to create a visual pathway to your subject or focal point. It is a composition technique where you are using the lines in the background or foreground to direct the viewer’s attention to the subject.
When we say lines, we are not necessarily referring to straight lines that point towards the main subject. Leading lines are often diagonal, curved, or just elements that are positioned in a way that help guide the viewer’s eye to the point of interest.
Camera: Canon EOS 5Ds R | Lens: Canon EF17-40mm F/4L USM
Natural Light | f/5.6, 1/6sec, ISO 100| |Lee ND Filters
Photo by © Sergey Bidun
FINDING THE LEADING LINES
How do we find the leading lines? They are literally everywhere around us; you just have to notice them. Once you start paying attention to leading lines, you will start seeing them everywhere!
As you are thinking of an interesting way to frame your image, pay attention to the surroundings. Analyze how the elements around you can help lead all the attention towards the subject.
It might be helpful to do this by looking for leading lines through the viewfinder of your camera. Framing your image this way will give you a better idea of what the end result will be.
If utilizing the viewfinder, I like turning on the grid lines to help me with the rule of thirds technique. Leading lines, in combination with the rule of thirds technique, will help you create a more dynamic and storytelling image.
Here are some examples of leading lines that you may utilize in your photography:
| Road/Pathways | Fences |
| Buildings | Stairways |
| Window Panes | Floor Lines |
| Shadow Lines | Rivers |
| Shorelines | Boardwalks |
| Bridges | Brick Walls |
| Doorways | Tunnels |
| Trees | Waves |
These are just some ideas of the most common leading lines that you can encounter around you. You can use pretty much anything in nature as leading lines, just be creative!
Once you get into the habit of looking for them, you will start seeing leading lines whenever you are framing your shots. No matter if you are photographing landscapes or capturing portraits, you can implement the leading lines composition technique. Leading lines will help to enhance your photographs and take them to a whole new level.

Camera: Canon EOS 5Ds R | Lens: Canon EF17-40mm F/4L USM
Natural Light | f/13, 30sec, ISO 50| |Lee ND Filters
Photo by © Sergey Bidun
5 TYPES OF LEADING LINES
Using tools such as leading lines is guiding the viewer’s eye to a specific point of interest. We, as photographers, are controlling what the viewer sees and how they experience particular images.
Leading lines can be any shape and any direction, and can each be used to communicate different moods and emotions to the viewer. Let’s discuss some of the most common directions of leading lines.
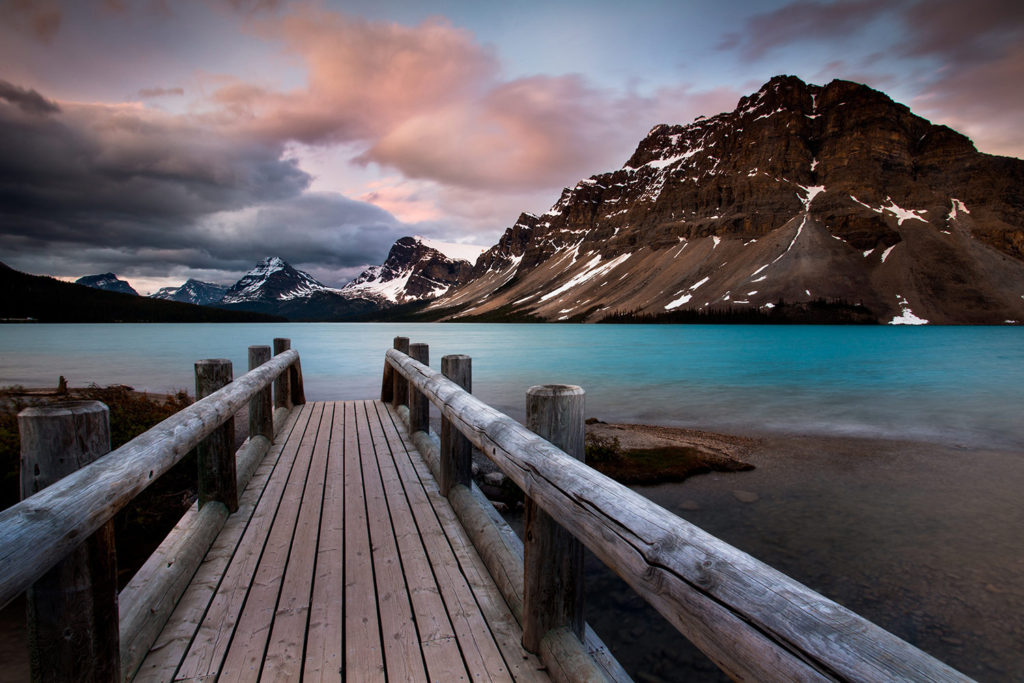
HORIZONTAL
Horizontal leading lines are often used in landscapes as well as portrait photography. When shooting a horizontal photo, usually, you have more room on the left and right sides of the picture. Look for available leading lines that will point towards the main subject of your frame.
Horizontal lines strengthen the composition of the image by creating a sense of peace and tranquility. Watch out for a straight horizon line when photographing landscapes.
The image below, is framed in a way that shows the mountain tops leading to the middle of the frame. Immediately the viewer’s gaze is lead to the center of the image where we see snow peaks and beautiful clouds. If the image was framed differently, it wouldn’t have the amount of interest and appeal that it has now.

Camera: Canon EOS 5Ds R | Lens: Canon EF17-40mm F/4L USM
Natural Light | f/22, 1.6sec, ISO 50| |Lee ND Filters
Photo by © Sergey Bidun
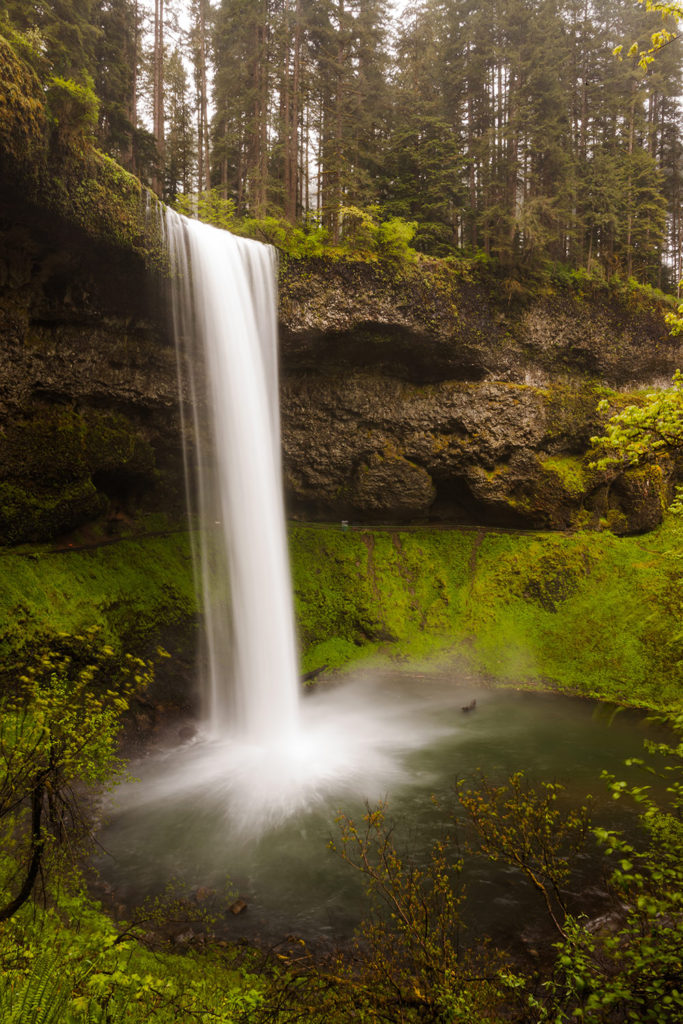
VERTICAL
Vertical leading lines work best for vertical photographs. Usually, you would use vertical lines on the top or the bottom of the frame. If you are using them from the top of the frame, they are going to be pointing down towards the subject. If you are using leading lines from the bottom of the frame, they are going to be pulling the viewer directly at the photograph.
You can even use leading lines both from the top and the bottom sides, all in one photograph. This can really boost the interest level in your composition.
First, figure out if you are aiming for a horizontal or vertical frame. Then you can start working with a more creative leading line composition for your image. You want to make sure that your leading lines complement that subject matter placement.
The way the waterfall falls into the river, helps to guide the viewer to look where the water is falling. We are drawn to see the water splash in this long exposure shot.
Camera: Canon EOS 5Ds R | Lens: Canon EF17-40mm F/4L USM
Natural Light | f/22, 0.8sec, ISO 50| |Lee ND Filters
Photo by © Sergey Bidun
DIAGONAL
When using diagonal leading lines, the photographer implies a sense of motion and adds depth to the image. The viewer is intrigued to see where the diagonal line will take him.
It’s best to use diagonal leading lines from the bottom left corner of the frame and up diagonally as our eyes are naturally looking that direction. The landscape image below is a great example of diagonal leading lines. The creek is going from the bottom left corner up diagonally. This creates a visual pathway for our eyes to look towards the main point of interest – the huge rocks.
If you want to learn more about how you can improve your landscape photography skills, we recommend you to read our Tips for Landscape Photography post.

Camera: Canon EOS 5Ds R | Lens: Canon EF17-40mm F/4L USM
Natural Light | f/22, 5.0sec, ISO 50| |Lee ND Filters
Photo by © Sergey Bidun
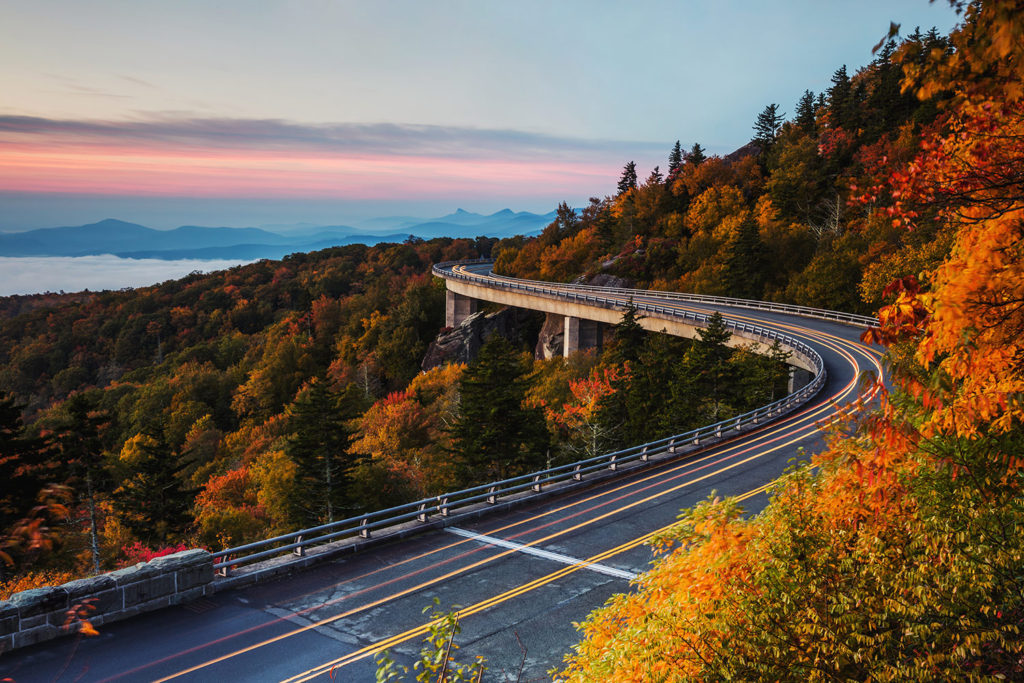
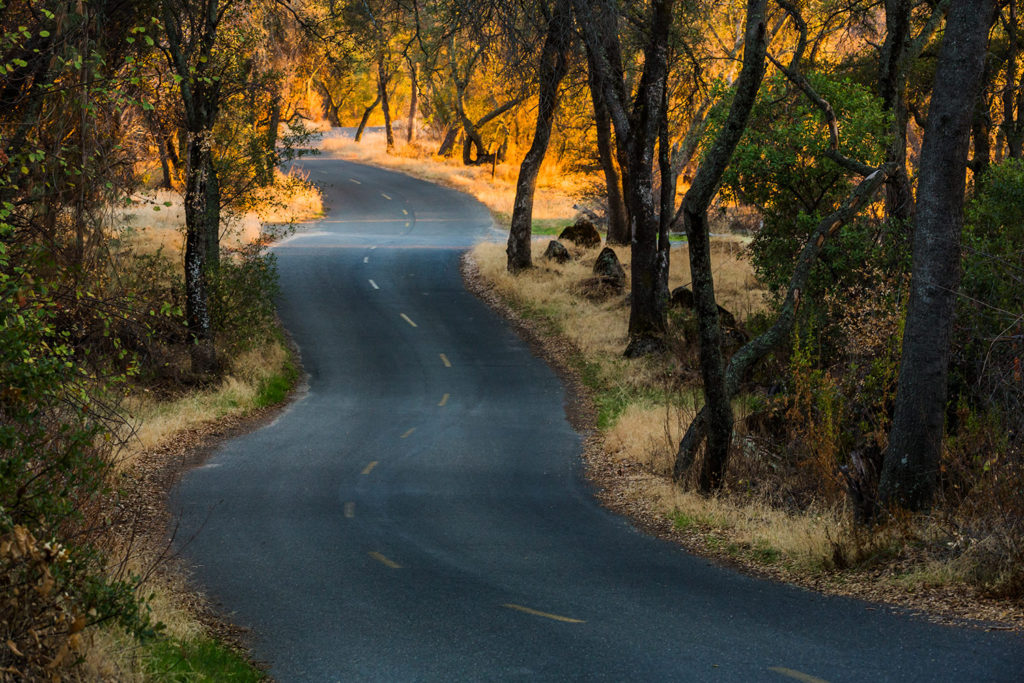
CURVY
When shooting out in nature, a lot of times, you will encounter curvy leading lines. Pathways, rivers, train tracks, and rock formations often come in curvy lines. More often than not, landscape photographers utilize curvy leading lines in their photography.
This landscape photo looks much more interesting with the winding road leading us further down the image. Winding roads and pathways look very storytelling in family and children photography as well. To make the people portraits more storytelling, try implementing curvy leading lines in your photography.
Camera: Canon EOS 5Ds R | Lens: Canon EF17-40mm F/4L USM
Natural Light | f/10, 1/40sec, ISO 1000| |Lee ND Filters
Photo by © Sergey Bidun
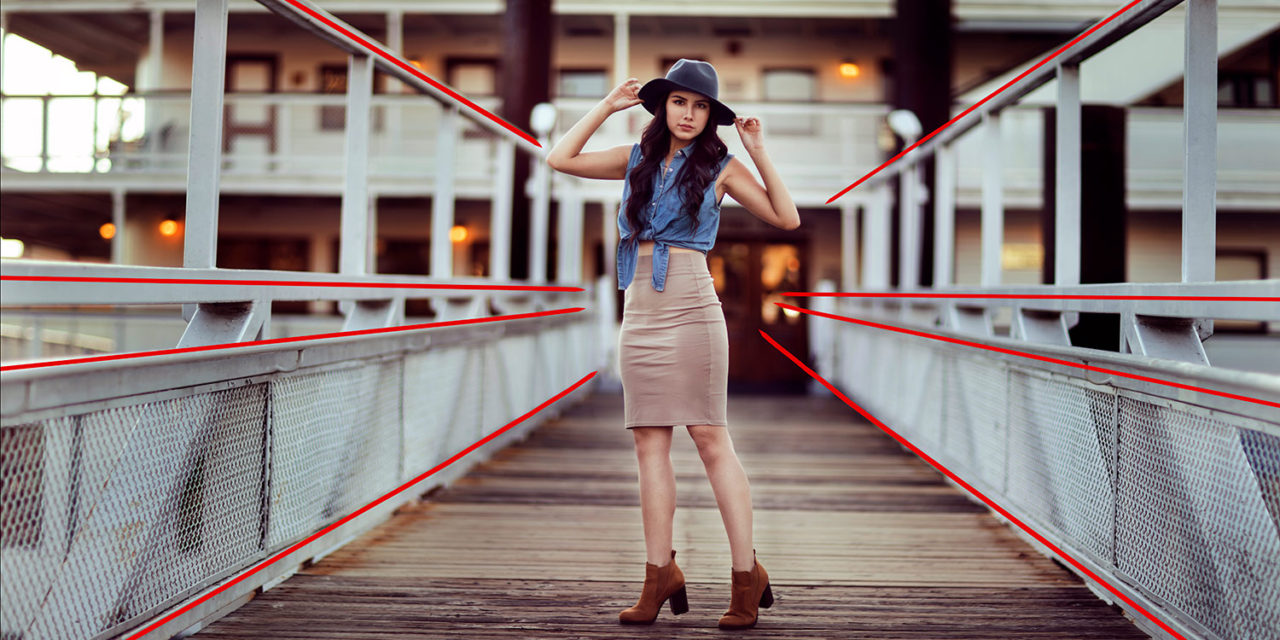
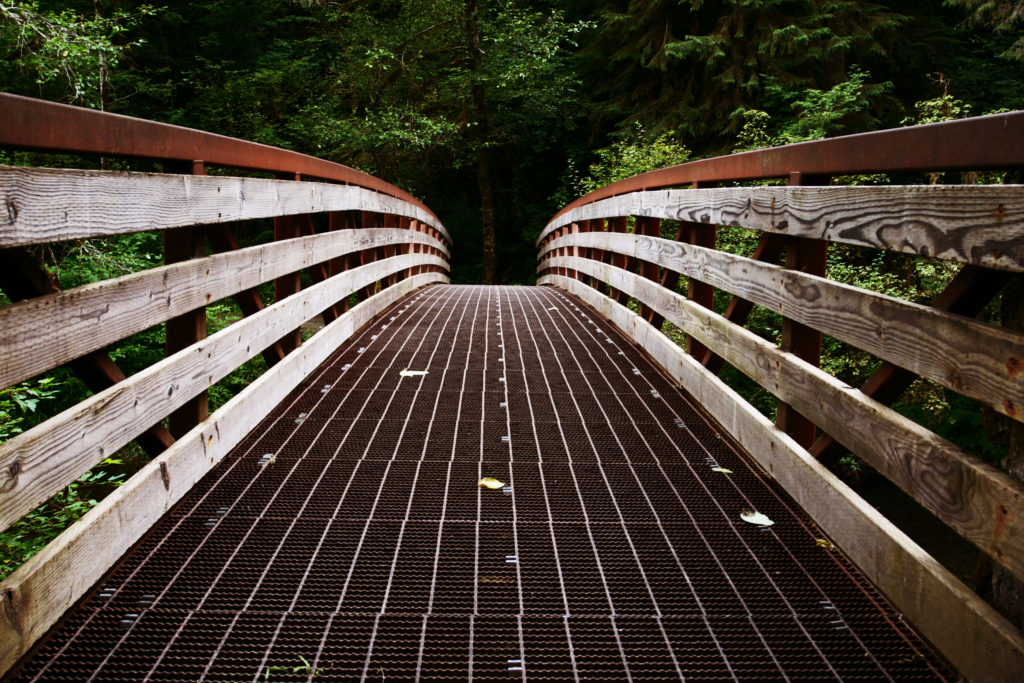
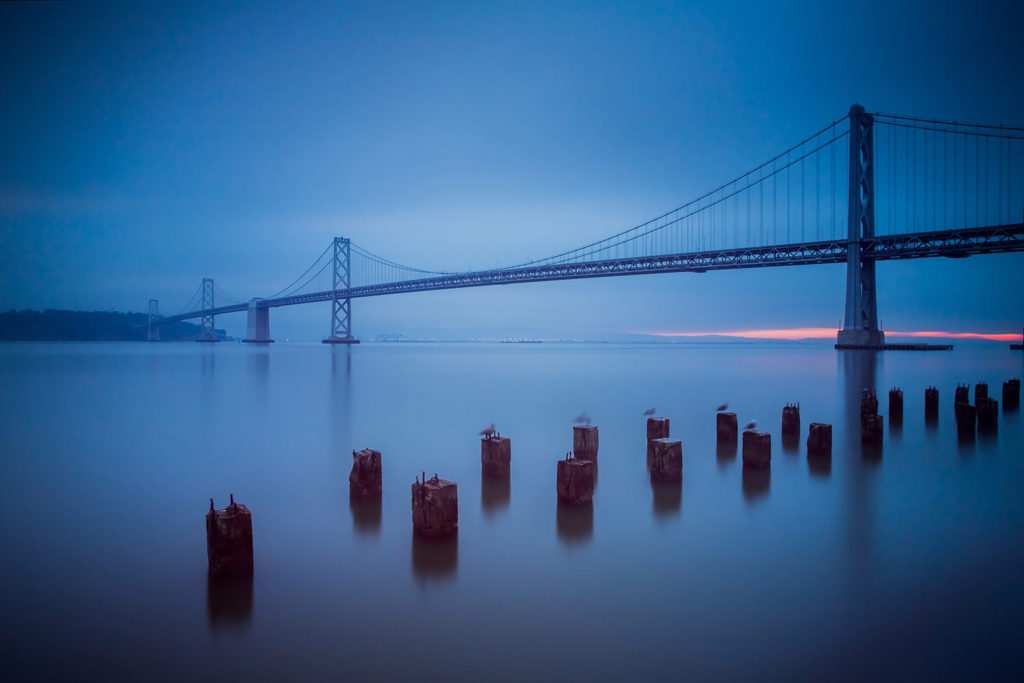
CONVERGING
Converging leading lines is a creative way to highlight a subject naturally. It is an excellent composition technique for focusing the viewer’s attention on the subject matter.
Converging lines all culminate at one point that vanishes off in the distance. Our eyes are just naturally drawn to these sorts of lines. The human eye is drawn to pattern. Photographers can use that effectively to create landscapes, urban landscapes, and even portraits.
Remember, whatever leading lines you are using, the closer you get to them, the more impact they will have. Depending on the subject you are photographing, choose the leading lines technique that will draw attention to the object, and not the other way around.

Camera: Canon EOS 5Ds R | Lens: Canon EF17-40mm F/4L USM
Natural Light | f/16, 1/6sec, ISO 50| |Lee ND Filters
Photo by © Sergey Bidun
HOW DO YOU SHOOT THE LEADING LINES?
Leading lines are at their best when there’s something at the end of the line to bring the viewer’s eye to a certain point. There is really not much point in having a leading line that doesn’t lead anywhere.
As a photographer, you have a lot of power to control where the leading lines point. Although you can’t physically move the cliff or the river, you can take a few steps to the side for a totally different perspective.
Lower or raise your camera a bit, and you will see quite a different scene in front of you. Always bring your tripod to landscape photoshoots; this tool is a must for creative and crisp images.
Where you stand and how you turn your camera makes a big difference. Figure out what the visual culmination point of your shot is, and then find a way to point the leading lines right at it.
Noticing the leading lines around you will take some getting used to, and that is what every photographer goes through in their learning path. Once you start noticing these “lines”, that’s when you will start getting creative with different angles and perspectives.

Camera: Canon EOS 5Ds R | Lens: Canon EF17-40mm F/4L USM
Natural Light | f/22, 5.0sec, ISO 50| |Lee ND Filters
Photo by © Sergey Bidun
HOW LEADING LINES IMPROVE YOUR COMPOSITION
Leading lines add depth to photos and make the images look far more interesting. To create more depth in your image, position a strong line leading from the foreground to the background within your frame.
You need to work around leading lines and have them in your photography as a purpose. Where are the leading lines pointing to? How are you using these lines, and what are you using them for? If you are just throwing them in, then you are not getting a full composition.
You really need to use leading lines as a complementary subject in your composition technique to direct people toward your subject matter. Think about how does this points to your subject? How does it complement the subject?
Camera: Canon EOS 5Ds R | Lens: Canon EF17-40mm F/4L USM
Natural Light | f/22, 6.0sec, ISO 50| |Lee ND Filters
Photo by © Sergey Bidun
OTHER COMPOSITION TOOLS
There are certain composition techniques and guidelines available for photographers when framing a photograph. When you use these guidelines, you can dramatically improve your images. You can use one or a few of these compositional tools for creating a more compelling image.
RULE OF THIRDS
The rule of thirds is one of the most commonly used composition tools or guidelines for photographers. Back in the Renaissance time, painters started noticing that by moving main subject from the center position to the side – the artwork became more interesting. Later on this concept became very popular among photographers. The rule of thirds recommends dividing the image into nine equal parts and placing your subject or point of interest into one of the intersecting lines instead of straight in the center. Rule of thirds applies not only to landscape photography, but also to architecture, macro photography, pet photography, and even portrait photos.
LEADING LINES
Leading lines is another composition technique that involves using elements in our environment to create a visual pathway to the subject or focal point. When using this technique, we are using the lines both actual and implied to direct the viewer’s attention to the subject.
SYMMETRY AND PATTERNS
Shooting symmetrical objects is a cool way to create visual balance. We can find symmetry in architecture, in nature, in people – almost anywhere. If your intention is to show how symmetrical your object is, or the piece of architecture that you are photographing – go for a perfectly balanced image. If you are trying to show a pattern with your camera, symmetric images is your way to go. Not always it is the best way to showcase your subject, but this composition tool is definitely available for photographers’ use.
FRAME WITHIN A FRAME
The frame within a frame composition technique helps to lead the viewer’s interest into a certain focal point of your image. It also helps to create depth, context, and overall aesthetic. Examples of the frame within a frame scenario include a subject standing in a doorway of a building, or a subject positioned behind a window where the window frame creates this interesting composition. When you are out photographing in unique locations, keep your eyes open for the possible frame within a frame composition.
ADDING FOREGROUND FOR DEPTH
One way to improve composition and add depth to your image is by adding something to the foreground. This technique works specifically well for landscape photographs. Carefully picked out foreground can greatly enrich your image, and help to guide the viewer toward the main focal point. However, we must be careful when adding foreground to a landscape photo or a portrait. Often times, a foreground can be a distraction, if it’s not carefully planned out. Always evaluate the scene and your frame to make sure that the foreground adds depth to the image and not draws all of the viewer’s attention away from the focus point.
FOCAL LENGTH AND APERTURE
The focal length of each shot depends on your lens capabilities. The wider the lens such as 14mm, the more surroundings your image will include. If shooting with a narrow focal length such as 200mm, the lens zooms in on the subject while eliminating most of the surroundings. By choosing a wide or a narrow focal length, you will determine what your image composition will be.
Aperture is responsible for the amount of light recorded by the sensor of your camera. If shooting in manual mode, you will have to adjust these settings yourself. You can also choose to set your camera to aperture priority mode and the camera will do those adjustments by itself. You can learn more about Aperture Priority Mode in our detailed post.
LIGHT AND SHADOW
Light and shadows play a significant role in image composition. Placing the subject in a well lit area will tend to draw more attention to it. In contrast, if you want to hide some part of background or a distracting object, try to compose your image so that those areas are in the shadow. In portrait photography, always watch out for shadows that can ruin your shot if they fall in the wrong area. Lights and shadows are helpful compositional tools in all genres of photography – from landscapes, to street photography, to architecture, to macro, and to portrait photography.
ANGLE
And last but not the least is the Angle compositional tool. We, as photographers, are not only creative individuals, but should also be flexible when it comes to choosing the right angles. In landscape photography, it’s best to use a tripod for getting the most crisp shots and long exposure images. But we must not forget that the tripod can be lowered if the photographer wants to get a more interesting angle. The same principle applies to macro photography, where the photographer must get on a much lower level in order to capture the best photo.
Angles are even more important in people photography. If you are photographing children, it’s very crucial to photograph them at their level. The best children portraits are captured at their level, and you can learn more tips about children photography from our post. Fashion photographers are also working with different angles to create more interesting images. Model posing is impossible to creatively portray without using unique angles and perspectives.
Camera: Canon EOS 5Ds R | Lens: Canon EF17-40mm F/4L USM
Natural Light | f/13, 450sec, ISO 200| |Lee ND Filters
Photo by © Sergey Bidun
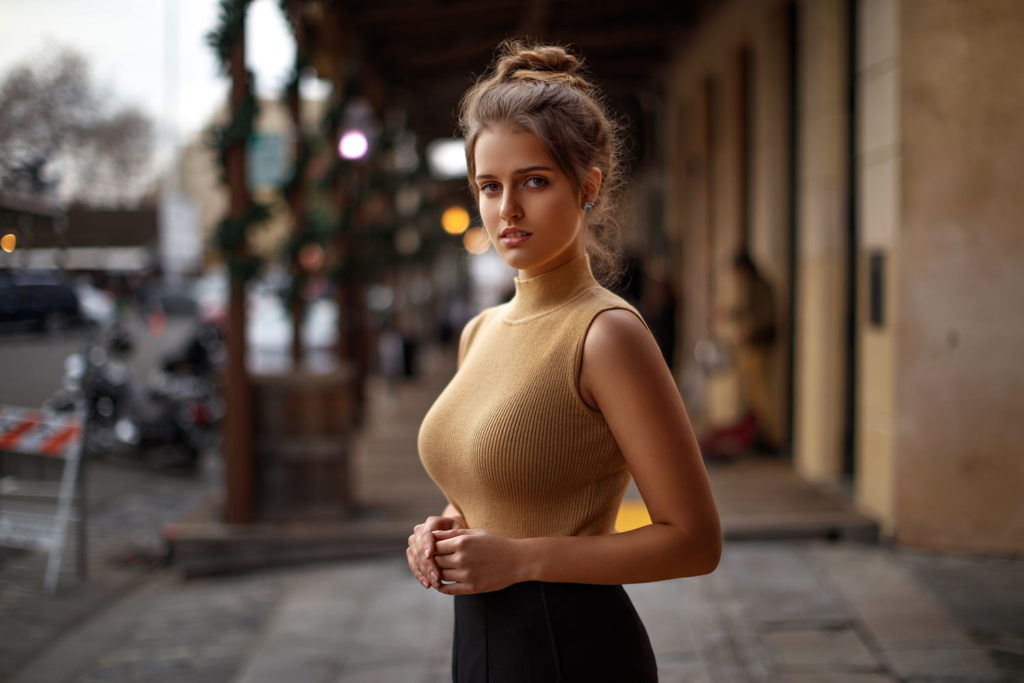
LEADING LINES IN PORTRAIT PHOTOGRAPHY
Leading lines aren’t just for landscapes and architecture photography. Use them in portraiture to create stronger and more artistic images.
Here are a few examples of how you can utilize surroundings, nature, and the model herself when working with leading lines.
• Use classic leading lines such as brick walls, buildings, and other strong set lines to draw the viewer’s eye towards the subject’s face. Have your model lean to the wall, to create the perfect leading line effect. Utilize the rule of thirds technique as needed, for a more creative female portrait.
• Make use of surroundings such as benches, stairways, or handrails as leading lines toward your subject. It’s great to use these types of locations and elements in high school senior portraits, as it provides lots of room for creativity.
• If you are limited with surrounding elements but still want to take creative portraits – use the model’s legs and arms to draw attention to the face. Have the model pose in a way that her hands are pointing toward the face – serving as leading lines. Eyes are particularly important in portrait photography. Always accentuate and highlight the eyes.
LIGHT & SHADOWS IN PORTRAIT PHOTOGRAPHY
• Light and shadows can also serve as leading lines in portrait photography. If you position your model toward a window light, a dark shadow will appear right behind her. This way, the shadow serves as a leading line to push all the focus towards the subject of the shot. Another example of this would be positioning the person right in the spotlight where the sun is hitting. Since the person is the only one being illuminated, the dark background will serve as leading lines for this portrait.
Camera: Canon EOS 5DS R | Lens: Canon EF 50mm f/1.2 L USM Lens
Window Light | f/1.4, 1/640s, ISO 200 | Photo by © Sergey Bidun
WHEN NOT TO USE LEADING LINES
The main job of a leading line is taking the viewer to a specific point of interest in the image. When a line doesn’t accomplish its mission, it creates confusion for the viewer.
When you come across a good leading line, make sure it is pointing to where you want the viewer to look.
Don’t use lines that lead the viewer out of the frame, or somewhere with no particular point of interest. This will only create confusion for the viewer, as their eye won’t have an object to concentrate on. The viewer will tend to skip images like that.
However, too many lines will also likely confuse and make the viewer frustrated. Having too many elements and lines will make the viewer unsure in which direction to look.
It’s important to remember that not all images need to have leading lines to appear the most creative or interesting. If you are shooting portraits in a studio or at a location that doesn’t seem to have any leading lines, don’t worry. Your main goal is to highlight the person that’s in front of your camera, by bringing focus to their eyes. In portrait photography it’s crucial to have focus on the eyes, and we’ve dedicated a full post on this topic. See for yourself why it’s important to bring out the eyes in portrait photography.
My advice is to start with simple leading lines and start combining more complicated compositional techniques as you improve your skills in photography.

Camera: Canon EOS 5DS R |Lens: Canon EF 85mm f1.2L II USM
Window Light | f/1.2, 1/8000s, ISO 200 | Photo by © Sergey Bidun
CONCLUSION
Now that you know what leading lines are, you are probably anxious to get out there and start shooting!
Be on a lookout for lines that you can use as guiding lines for your landscape, architecture, or portrait photography. Always make sure that your leading lines point toward the subject and not out of the frame or nowhere in particular.
Having basic knowledge in leading lines will allow you to compose more compelling images.
I hope these tips will help you to improve your image composition and open up opportunities for more creative photography.
IF YOU FOUND THIS POST HELPFUL AND INFORMATIVE PLEASE SHARE IN YOUR SOCIAL MEDIA.
Photographer: Sergey Bidun
Written by Maria Bidun


![Black and White Portrait Photography [Ultimate Guide]](https://bidunart.com/wp-content/uploads/2020/04/Portrait183a-440x264.jpg)