A lot of photographers struggle with night portrait photography since it requires a lot of skill and work. You would need to bring in a flash, a tripod, and maybe some other gear. But what if you are just starting out in photography and don’t own any of the lighting gear?
If you are looking for ways to improve your night photography skills – this post is for you.
We’ve prepared our top 5 tips for successful night portrait photography for beginners. We will discuss ways how you can take better nighttime photos without using any additional gear besides your camera and lens.
This post may include affiliate links. Please read our disclosure policy. [017]
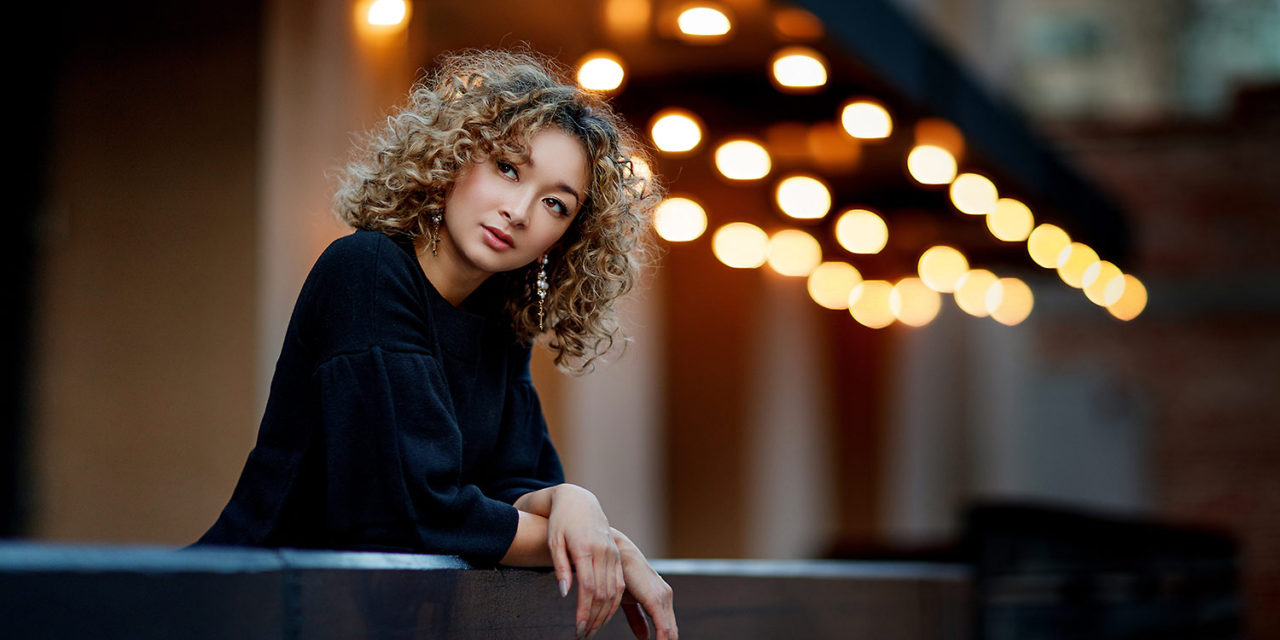
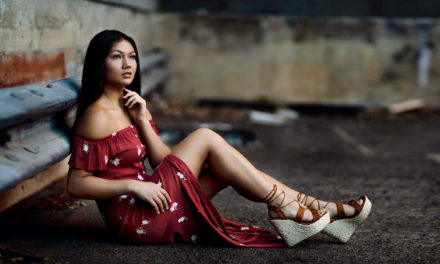
Camera: Canon EOS 5DS R | Lens: Canon EF 85mm f1.2L II USM
Sky Natural Light| f/1.2, 1/250s, ISO 640 | Photo by © Sergey Bidun
INTRODUCTION TO NIGHT PHOTOGRAPHY
Shooting at night is one of the most challenging types of photography. The main reason for this is, obviously, the lack of light sources.
Even if there is some kind of light, it is usually too contrasty and does not look too good on the screen. As a result, the subjects do not look as beautiful as we would like.
We turn the light sensitivity and immediately encounter a considerable amount of noise in the image. And this is far from the only problem.
Everyone who has ever shot something at night knows that such filming is associated with incredible complexity.
Extra light may be needed here to compensate for the lack of natural light. Or completely different photography equipment, including cameras and lenses with sufficient light sensitivity, capable of transmitting as much light as possible.
The list of requirements goes on and on. Nevertheless, if the budget does not allow you to rent studio lighting equipment, and the camera is not designed for such conditions, you can still do something.
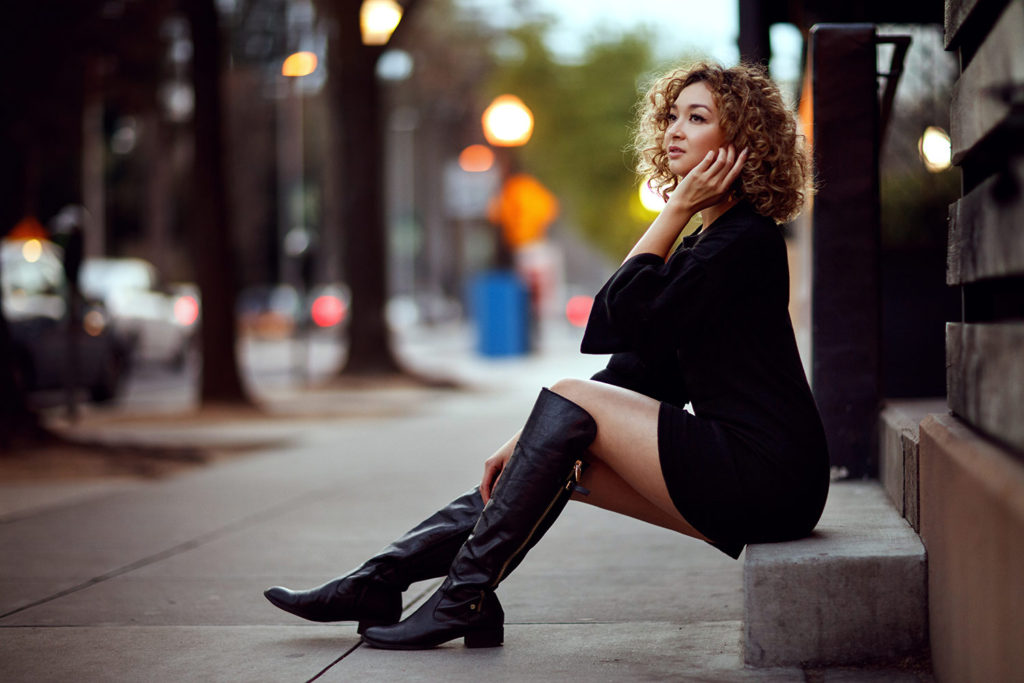
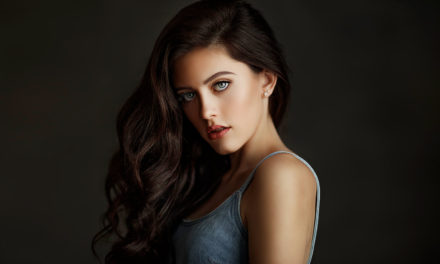
Camera: Canon EOS 5DS R |Lens: Canon EF 50mm f/1.2 L USM
Street Night Light| f/1.4, 1/100s, ISO 640 | Photo by © Sergey Bidun
WHAT NEEDS TO BE DONE TO GET A HIGH-QUALITY IMAGE WHEN SHOOTING AT NIGHT?
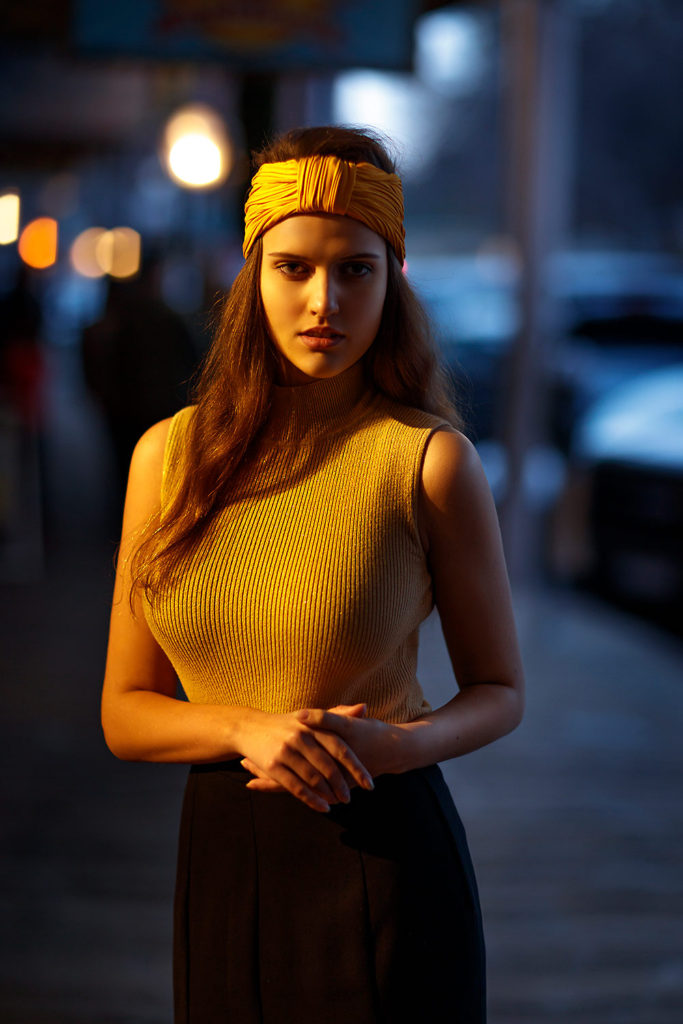
1. FIND A LIGHT SOURCE
During night photography, the first thing you need to do is find a good quality light source. As there will be no ambient light, you have to find a way how to lighten the frame.
Many people use streetlamps as light source, but this is not the best idea. Street lamps produce sharp, undiffused, and partly bright light, which will affect the appearance of the subject in not the best way.
I recommend finding a large source of soft lighting. For example, you can use store windows or even luminous signs: they look cool and they give us the soft and diffused lighting that we need.
Remember: the closer the camera and the subject are to the source, the brighter the frame and the softer the light.
Avoid small, contrasting light sources: this way, your subjects will look better, and images will be more enjoyable.
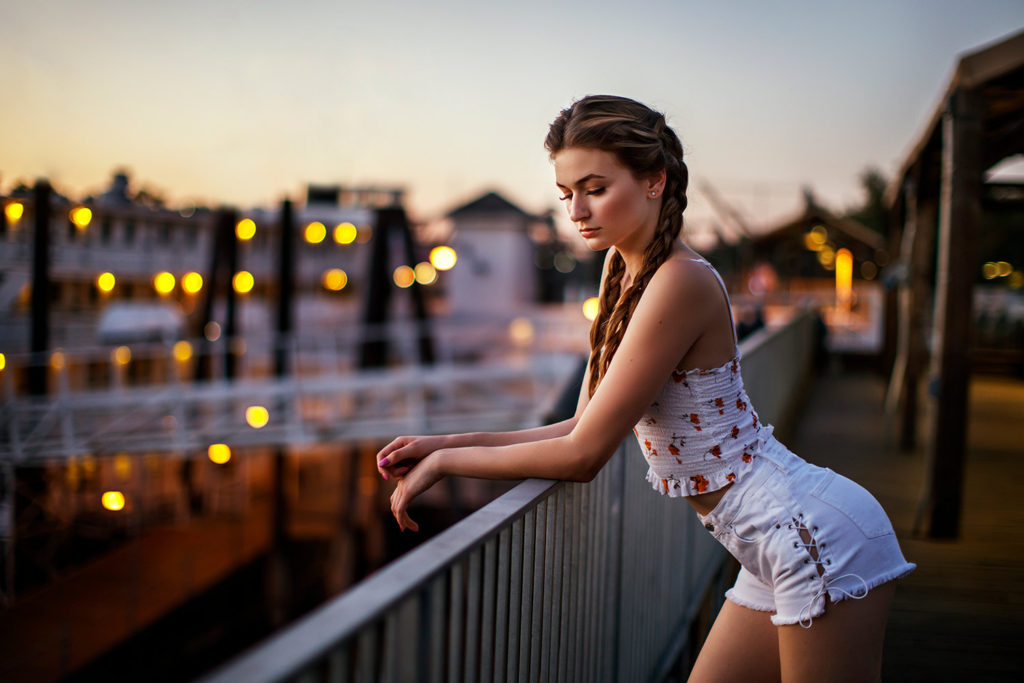
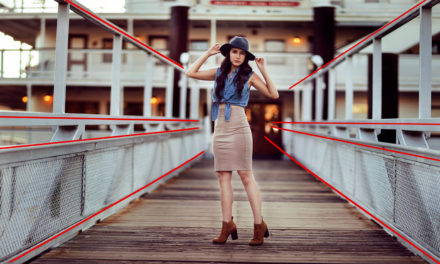
Camera: Canon EOS 5DS R | Lens: Canon EF 85mm f1.2L II USM
Street Night Light| f/1.6, 1/200s, ISO 500 | Photo by © Sergey Bidun
2. USE FAST LENSES
Fast lens lets in a lot of light. If the lens can open the aperture to f2.8 or even lower (f1.4, f1.8), the difference becomes apparent at a glance. Just look at these shots taken at identical settings but with different aperture opening.
As you can see, with an aperture of f1.4, the frame seems even overexposed, so we were able to lower the ISO.
Personally, I like working with the Canon EF 50mm f/1.2 L USM series lens the most. Another great option is a Canon 35mm f1.4L series lens; you can get amazing portraits with it.
You can even get some decent images with a simple Canon 50mm f1.4 if you can’t invest in more serious gear. Practice shooting night photography with what you have, and eventually upgrade to a better lens.
3. PHOTOGRAPH SILHOUETTES
If you are not able to find the right light that you are looking for, do not be discouraged. Use a sharp source of light and let it turn the subject into a silhouette.
For this type of image, a fast lens, such as f1.4, will work really well. It will allow you to achieve a beautiful bokeh effect in the background.
A game with contrasts, harsh lighting, and a dark silhouette against its background is almost always win-win since it immediately draws the eye. Do not worry about the ideal lighting on the subject – the main thing is that the viewer sees the silhouette.
*Silhouette night portrait, no flash*
4. DO NOT TURN ISO TO THE MAX
Slightly increasing photosensitivity during night photography is one thing, but if you turn the ISO to the maximum, you will get very noisy and blurry frames.
There is no single top ISO limit since all cameras behave differently under the same conditions. Play around with your camera’s ISO settings to see the difference it makes – you will be surprised at the results.
It is essential to find a compromise between noisy frames and barely distinguishable objects in the dark. And even if you shoot at a very high ISO, try to process a noisy image in post-production.
Unfortunately, most programs come out without built-in noise reduction, although such functionality helps a lot.
*Portrait at night with maximum high ISO*
5. DO NOT SHOOT IN SLOW SHUTTER SPEED
This tip may not seem very obvious, but remember one of the photography rules: the higher the frame rate per second, the more illuminated the frame should be.
If there is insufficient lighting, you will have to increase the ISO, and this will make the images only worse.
Take a look at these shots taken under the same conditions, but at different shutter speeds. The difference in light is evident.
Taking photos at slow shutter speed is one of the most challenging shooting tasks in night photography. If possible, try not to resort to it, and if you still had to use slow shutter speed – take extra light with you or find very bright sources of illumination on the street.
*Night Portrait images taken under same conditions but with different shutter speeds*
CONCLUSION
This summarizes my top 5 tips for night time portrait photography.
Want to make a truly beautiful night portrait? Find the right place to shoot first by paying attention to the type of lighting the street lights, store windows, or bright displays produce. Then with the help of a fast lens, you can create a pleasing night portrait. Play around with the shadows that the street lights create for more artistic portraits, as well as silhouettes.
Once you are able to upgrade to external flashes, your images will be on another level! Personally, I like to use Profoto B10 AirTTL off-camera flash together with a Profoto 36-inch Octa Softbox in my portraits. If this brand doesn’t work out for you, try looking for this lighting gear in other brands.
Another necessary tool for night time photography is a tripod. You will eliminate a lot of blurry images with the help of a good quality tripod. My recommendation is to invest in a good quality tripod that will last you for quite some time. A good option would be Manfrotto Befree Advanced Travel Tripod.
If you want to get memorable and high-quality fine art portraits or corporate headshots, do not miss the opportunity to reserve your photoshoot with Sergey Bidun, a professional Sacramento portrait photographer.
YOU MAY ENJOY SOME OF OUR SIMILAR POSTS
NATURAL LIGHT PHOTOGRAPHY | HOW TO IMPROVE OUTDOOR PORTRAITS
WHAT IS REMBRANDT LIGHTING AND HOW TO USE IT IN PHOTOGRAPHY
POSING TIPS FOR WOMEN PORTRAIT PHOTOGRAPHY
IF YOU FOUND THIS POST HELPFUL AND INFORMATIVE PLEASE SHARE IN YOUR SOCIAL MEDIA.
Photographer: Sergey Bidun
Written by Maria Bidun