Not every photographer works with models. Many of us shoot with everyday people, and we need to make them look like magazine-cover models. As photographers, we need to pay attention to the posing and expressions we are getting from the subject.
It’s more than just telling clients how and where to stand for the picture. Having a strong knowledge of posing tips and techniques is a large part of a successful female portrait photo session. Being open in communicating with the client will help your subject trust you and feel confident in producing high-quality images.
So what do you do when your clients have no experience posing or being in front of the camera?
The formula for success in the field of creative portrait photography consists of a few crucial points. Proper communication between the photographer and the client, the planning process, and, last but not least – the skill.
Here are my top photography posing tips that I’ve put together to help your subjects feel and look like models during every photo session. As one of Sacramento’s portrait photographers, I’m regularly practicing these ideas.
In this video you can see posing techniques that I use for women portrait photography.
GET TO KNOW THE CLIENT
Get to know your clients and think about how they want to be documented through your images. Interview your subject either through a phone or in-person consultation, to get to know your client better.
It is the photographer’s responsibility to understand how to achieve the needed result using poses that look authentic and natural. The success of a portrait session relies heavily on communication with your client to understand their character and personality.
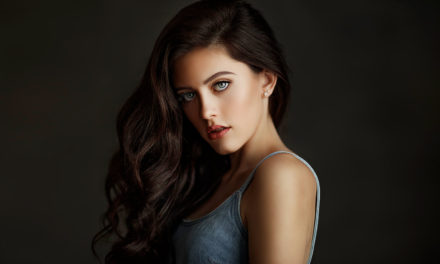
When photographing women, always remember that they want to be represented as beautiful and confident individuals. Stay away from poses that might add them extra pounds in weight or incorrect lighting that can make them look older than they actually are.
The client came to you to capture their beauty and confidence at the moment, and it’s the photographer’s job to know the lighting setup, posing, and proper guiding to produce such images.
We recommend you read our article How to Prepare for a Portrait Photo Session, for more ideas on the preparation process.
This post may include affiliate links. Please read our disclosure policy. [005]
Camera: Canon EOS 5DS R | Lens: Canon EF 85mm f1.2L II USM
Window Light | f/2.0, 1/125s, ISO 250 | Photo by © Sergey Bidun
GEAR USED TO CREATE THESE IMAGES
For the images listed throughout this post, different photography gear and lighting equipment were used.
- Camera: CANON EOS 5DS R
- Lenses: Canon EF 85mm f1.2L II USM
- Canon EF 50mm f/1.2 L USM Lens
- Lighting: Profoto B1 500 AirTTL Location Kit
- Retouching tablet: Wacom Intuos Pro Medium Drawing Tablet
- Software: Adobe Photoshop and Lightroom
- Computer: Apple iMac, 27-inch Retina 5k display
FOLLOW US ON “INSTAGRAM“
CHECK OUT BEHIND THE SCENES ON “YOUTUBE“
SEE OUR PORTFOLIO AT “BIDUNSTUDIO.COM“
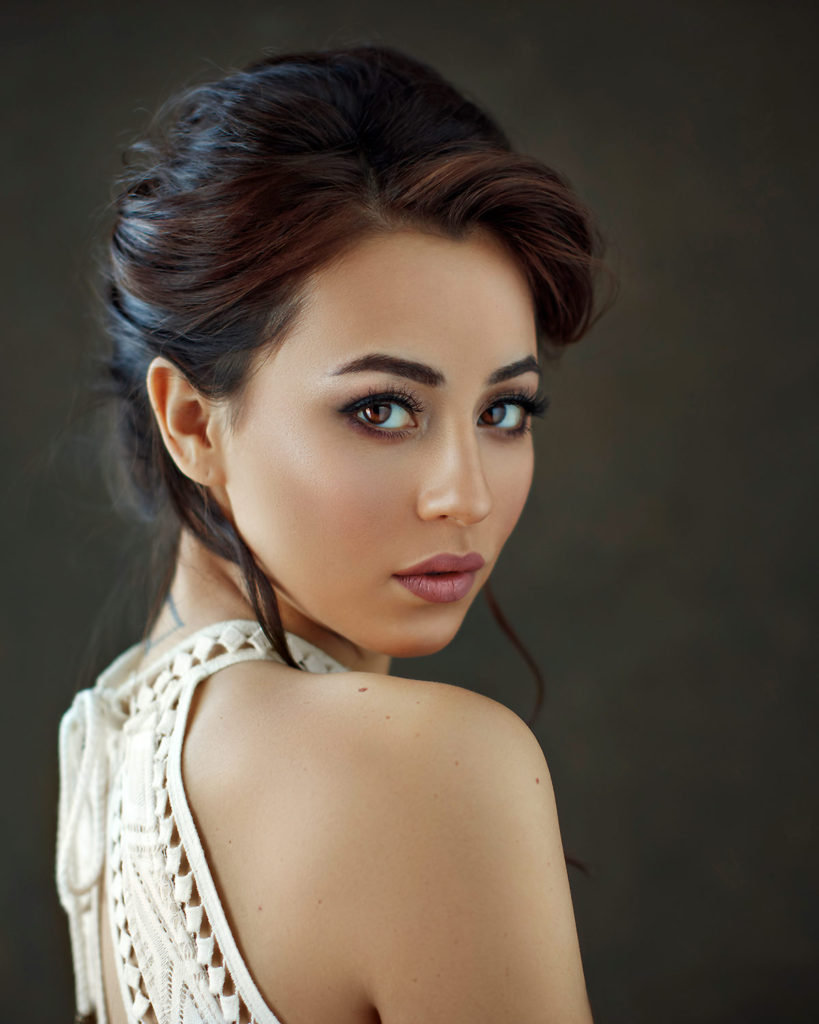
KNOW YOUR SUBJECT’S PREFERRED SIDE
It is always a great idea to ask your subject if she knows her preferred side – aka “the good side.” If they have a favored profile, remember it and keep it in mind throughout the photoshoot.
Doing so and being attentive, will make a big difference in how your clients will like their images. Communication is one of the key components during a portrait session; don’t forget that.
Camera: Canon EOS 5DS R | Lens: Canon EF 85mm f1.2L II USM
Window Light | f/1.8, 1/200s, ISO 160 | Photo by © Sergey Bidun
KNOW HOW TO FIND THE BEST LIGHT
Depending on if you shoot outdoors or in the studio, as a professional photographer, you must know how to find the perfect lighting for any portrait session. Knowledge of light is your best friend — if you know how to position your subject at the right angles.
I work mostly with three main lighting setups: Rembrandt Lighting, Butterfly Lighting, and Split Lighting. These lighting settings help bring out natural shadows in the faces.
What sets the professional photographers apart from the apprentices, is being able to work with shadows and finding the right balance of it in their photographs.
Rembrandt Short Light
Camera: Canon EOS 5DS R | Lens: Canon EF 85mm f1.2L II USM
f/10, 1/200s, ISO 50 | Photo by © Sergey Bidun
Light: Profoto B1 500 AirTTL System
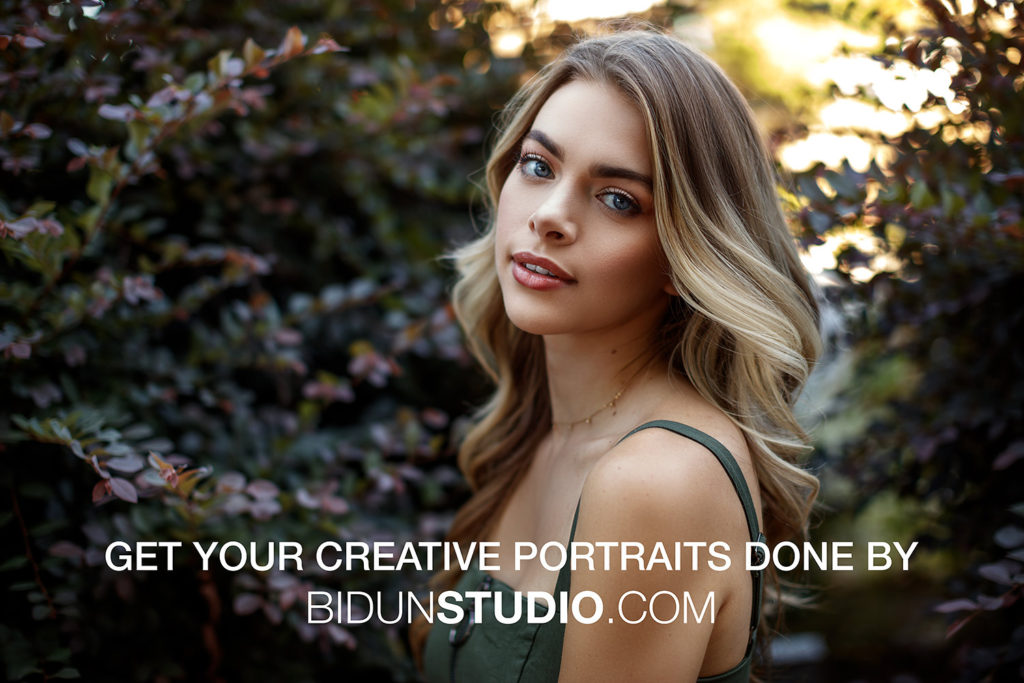
TURN SHOULDERS AWAY FROM THE CAMERA
Photographing your female subject head-on will only make them look bigger. You don’t want a female to look as if she’s a sports player with broad shoulders – there is no feminine beauty in it.
Have your subject turn a slight angle while keeping their head pointing to the camera – the model will look slimmer. Remember always to have the subject facing toward the light source, whether it’s natural light or studio light.
If you want to take an exceptional headshot, ask your subject to do the two-thirds turn, where the model’s upper body does a two-thirds turn away from the camera.
It is one of my go-to poses for taking beautiful close-up headshots for women of all ages. This also helps to give your subject a slightly slimmer profile.
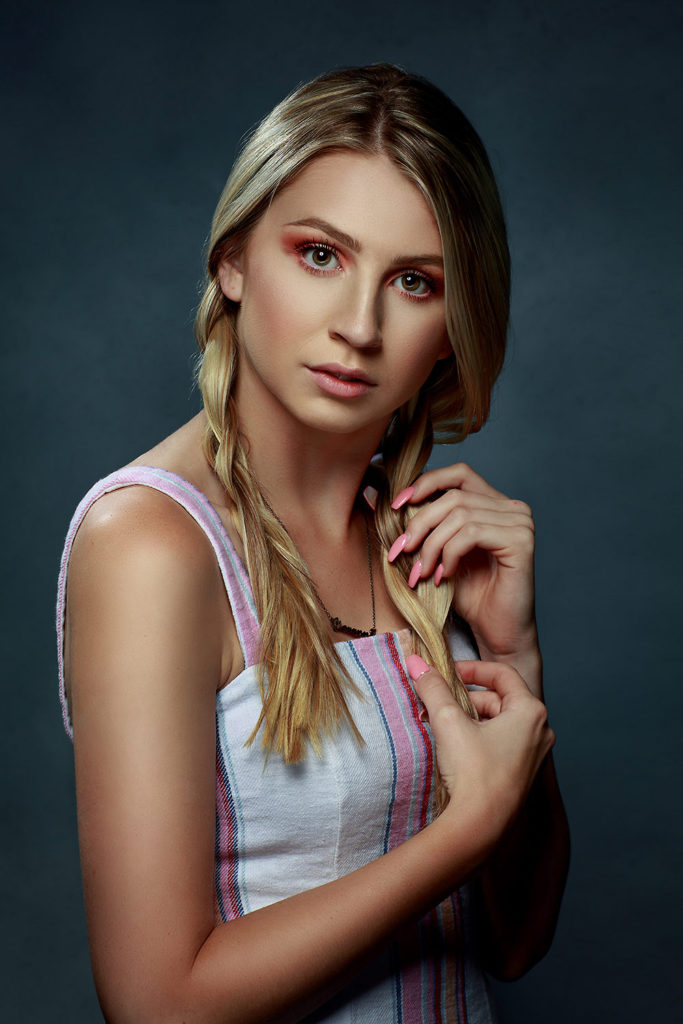
Back shoulder away from the camera
Camera: Canon EOS 5DS R | Lens: Canon EF 85mm f1.2L II USM
f/8, 1/200s, ISO 50 | Photo by © Sergey Bidun
Light: Profoto B1 500 AirTTL System
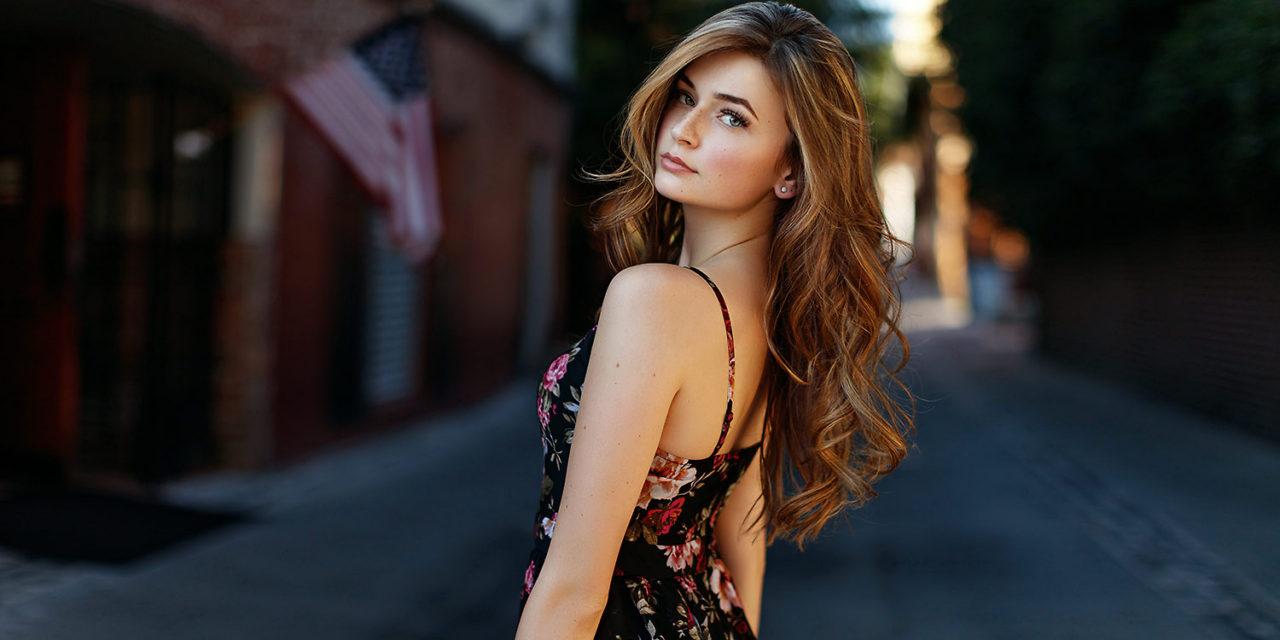
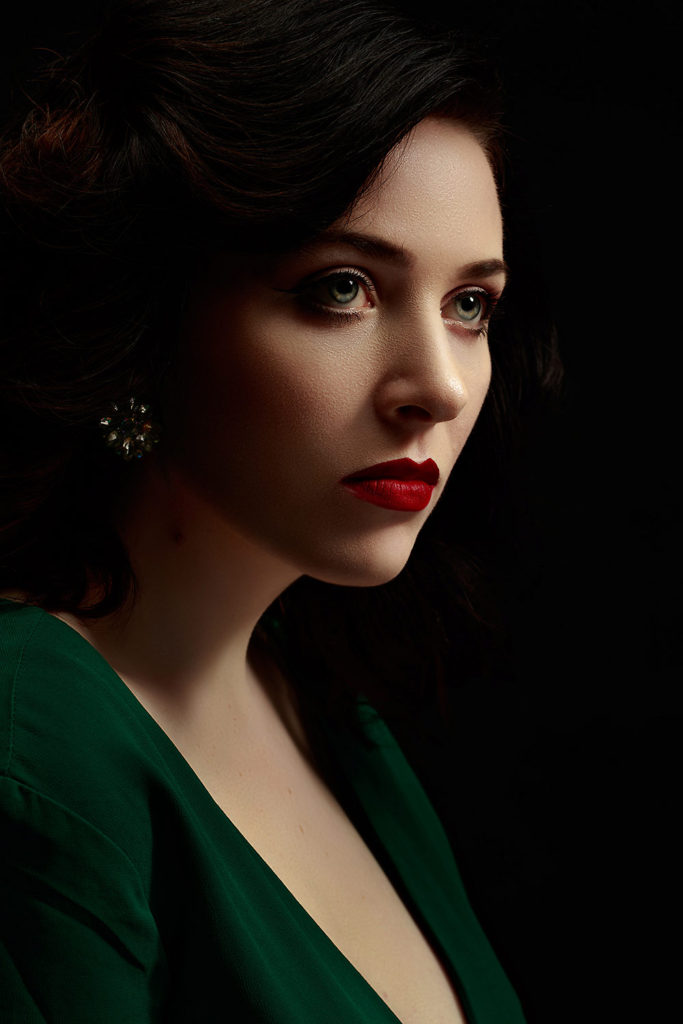
OVER THE SHOULDER LOOK
This pose emphasizes the beauty of a subject and makes a photo more dimensional by bringing all the attention to the face.
Have the female stand with one shoulder pointed toward the photographer, at about a 45° angle. Ask her to turn head slightly, so she’s looking over the shoulder toward the photographer.
Have the subject tilt the chin at different angles and give you different facial expressions for more creative portraits. This is a fantastic portrait pose for up-close headshots as well as half-body pictures.
Over the shoulder look
Camera: Canon EOS 5DS R | Lens: Canon EF 50mm f/1.2 L USM Lens
Window Light | f/2.0, 1/200s, ISO 320 | Photo by © Sergey Bidun
HOW TO POSITION NECK AND CHIN
To eliminate a double chin or short-looking neck, there are a few simple tips you can use.
The first step is to ask your subject to stretch their forehead forward and down. Doing so will pull the skin around the neck tight, creating a more flattering front-on portrait, and eliminating any double chin.
This posing technique is often used in the Fine Art photography genre. You can read more about Fine Art portrait photography here.
Stretch the head forward and chin down
Camera: Canon EOS 5DS R | Lens: Canon EF 85mm f1.2L II USM
f/1.4, 1/250s, ISO 320 | Photo by © Sergey Bidun
Light: Back Window light + 2 V-flats in front
Lengthening the neck will imitate height and give your subject a better posture. Have your client stretch out the neck to create space between the chin and the body.
This pose may feel not easy and a bit unnatural, but your client will love how this simple trick will give her a slimmer portrait. Try photographing this pose from slightly above, and you will get a much more defined jawline.
Create space between the chin and the body
Camera: Canon EOS 5DS R | Lens: Canon EF 85mm f1.2L II USM
Window Light | f/1.6, 1/320s, ISO 250 | Photo by © Sergey Bidun
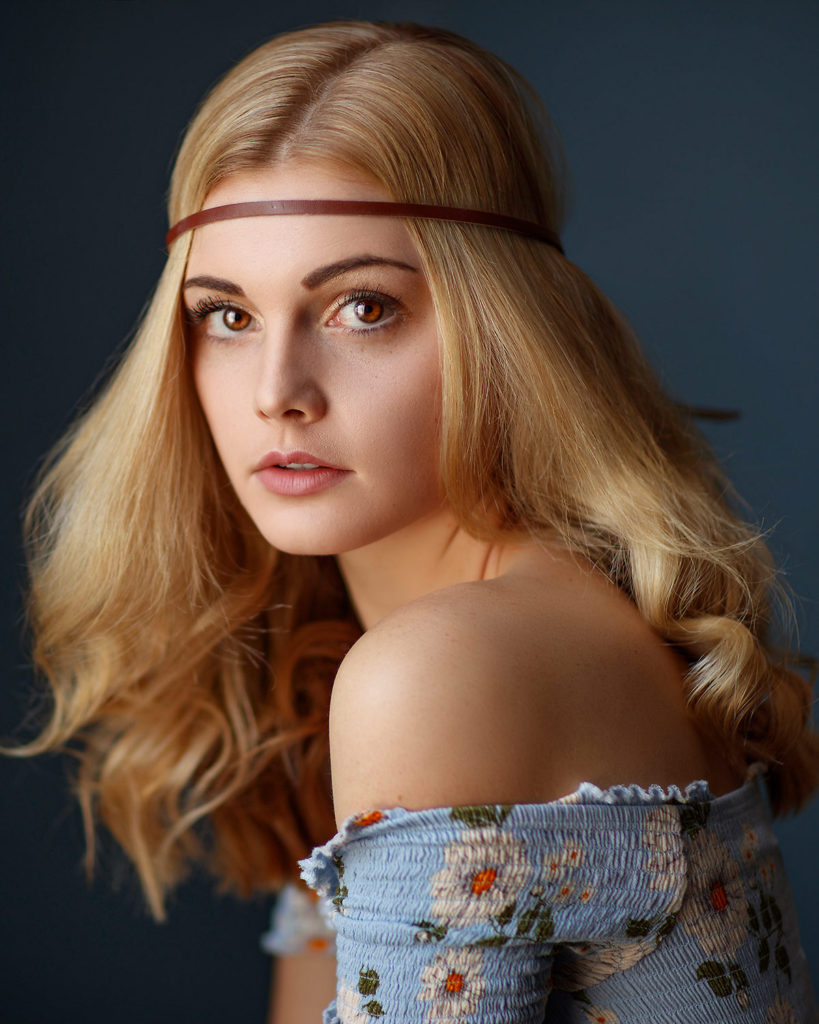
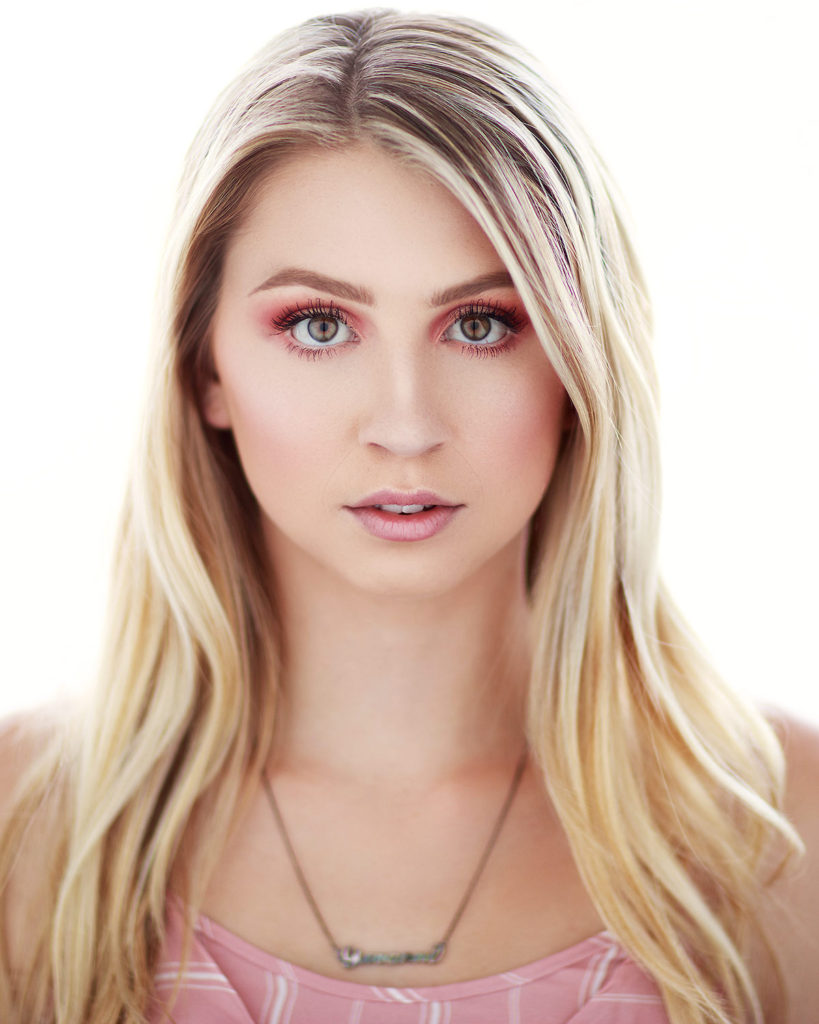
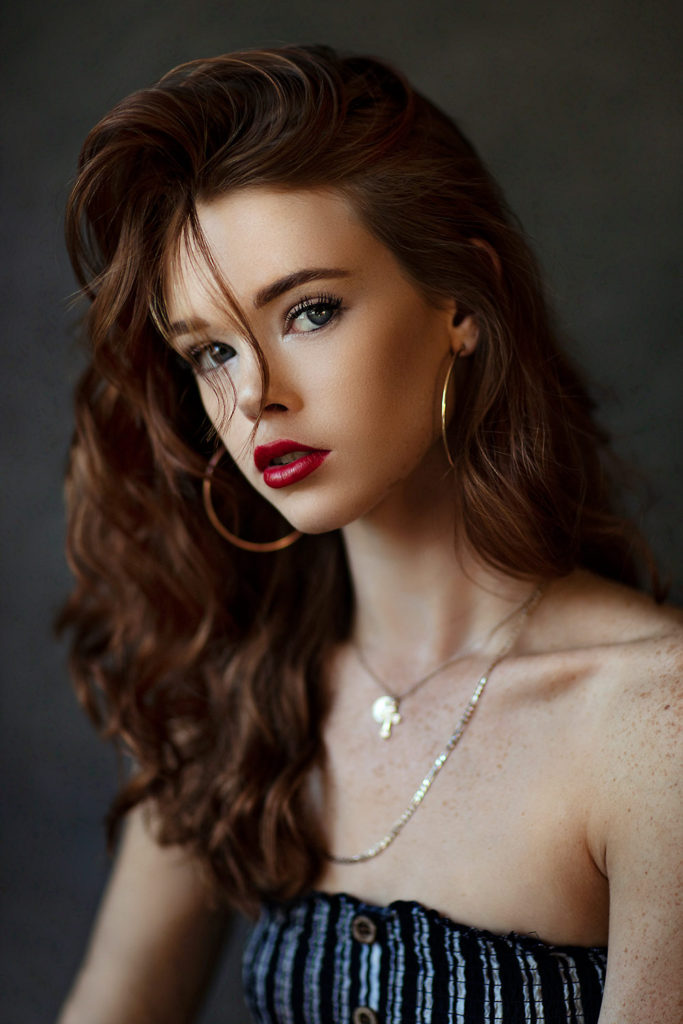
HIGHLIGHT THE EYES, DON’T SHOW TOO MUCH WHITES
The most attractive and striking feature in any portrait is usually the person’s eyes, especially in women portraiture. Whether the subject is looking directly into the camera or slightly to the side, it’s essential to keep your camera’s focus on the eyes.
When you are going for a creative, dreamy look, you may choose to have your subject look off the camera. Give them an object behind you to focus on so you can control their eye line.
Read our tips on How to Highlight Eyes in Portrait Photography article for more ideas.
The photographer needs to be able to see what is a good photo and what is not, as he is taking the image. You don’t want to show too much of the white of her eye; it won’t look good in any portrait.
If the subject is looking off to a side, you still want to see the colored part – the iris- in your shot. A small change in eye line will bring back the eyes and get rid of the unnecessary white part.
POSING THE HAIR
We don’t normally think of hair as a part of the body we can control, but you really can and should!
As part of the communication process between the photographer and the client, things such as hairstyles, make-up, and outfits should be discussed. No matter the length or the type of hair, it must be clean and neat.
If you are photographing a person with long hair, then messy hair will be the first thing people notice about your picture. It is very crucial that you discuss this aspect with your client before the photoshoot.
There are a few simple tips that you must be aware of to eliminate bad shots as much as possible.
• Don’t let the hair sit on the shoulders. It gets bent and starts looking messy by sticking in different directions.
DON’T: Hair sitting on the shoulders.
Camera: Canon EOS 5DS R | Lens: Canon EF70-200mm f/2.8L IS II USM
Window Light | f/2.0, 1/400s, ISO 250 | Photo by © Sergey Bidun
HAIR POSING TIPS
Have your subject keep the hairbrush handy, to be able to brush the hair when it starts looking tangled.
There are no specific rules as to what type of hairstyles looks ideal or perfect across the board. Everyone will look unique and different, no matter which way they style their hair.
Here are a few different ways your subject can position their hair to give an entirely new perspective for the portrait shoot. These tips would apply to medium-to-long length hair.
• Hair all behind the shoulders
DO: Hair all behind the shoulders
Camera: Canon EOS 5DS R | Lens: Canon EF 85mm f1.2L II USM
Natural Light | f/1.4, 1/6400s, ISO 100 | Photo by © Sergey Bidun
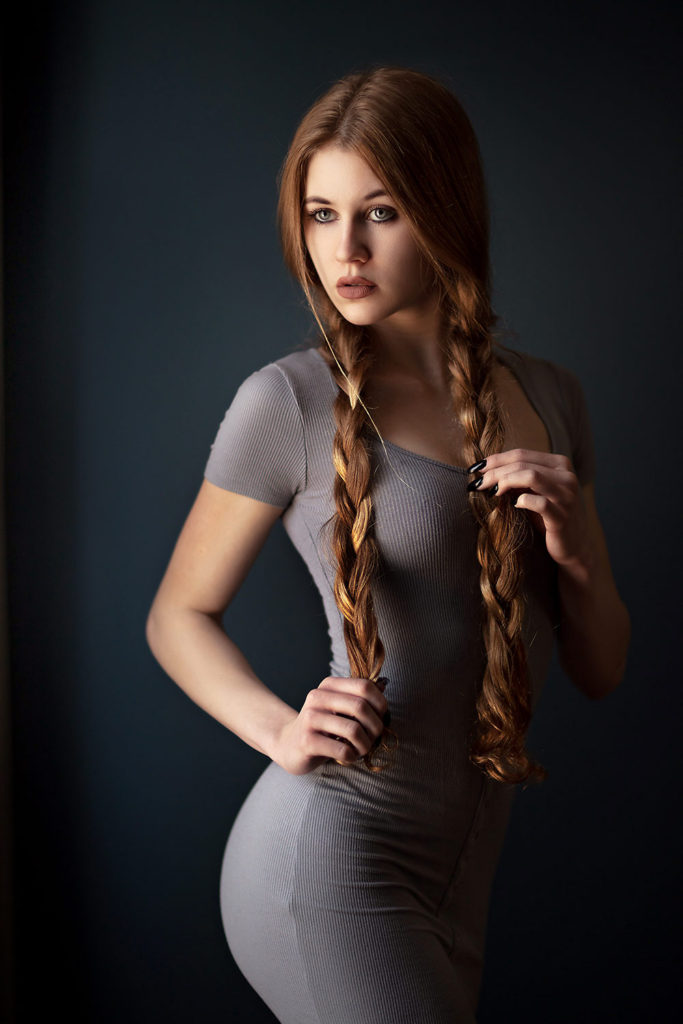
• Hair all in front of the shoulders

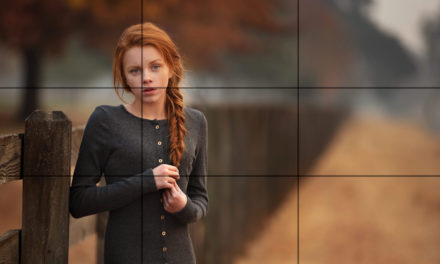
DO: Hair all in front of the shoulders
Camera: Canon EOS 5DS R | Lens: Canon EF 85mm f1.2L II USM
Window Light | f/1.2, 1/640s, ISO 50 | Photo by © Sergey Bidun
• Hair all on one side
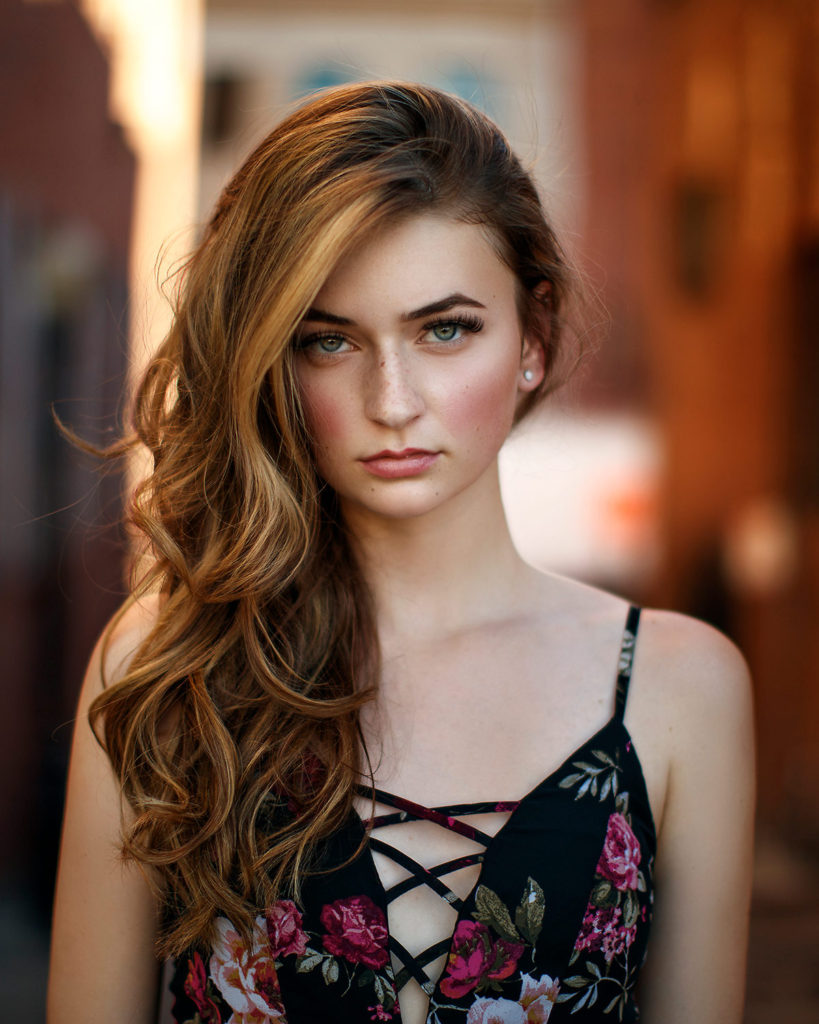
DO: Hair all on one side
Camera: Canon EOS 5DS R | Lens: Canon EF 50mm f/1.2 L USM Lens
Outdoor Natural Light | f/1.2, 1/1600s, ISO 100 | Photo by © Sergey Bidun
• Hair up

DO: Hair up
Camera: Canon EOS 5DS R | Lens: Canon EF 85mm f1.2L II USM
Window Light | f/2.8, 1/500s, ISO 800 | Photo by © Sergey Bidun
POSING THE WHOLE BODY
The truth is – the human body is both fascinating and awkward. It is a challenge to make each part of the body look exceptional in a portrait. Not every photographer and not every subject can overcome this challenge.
Even though whole body shots can be complicated, there are small adjustments you can make to help capture a more natural look.
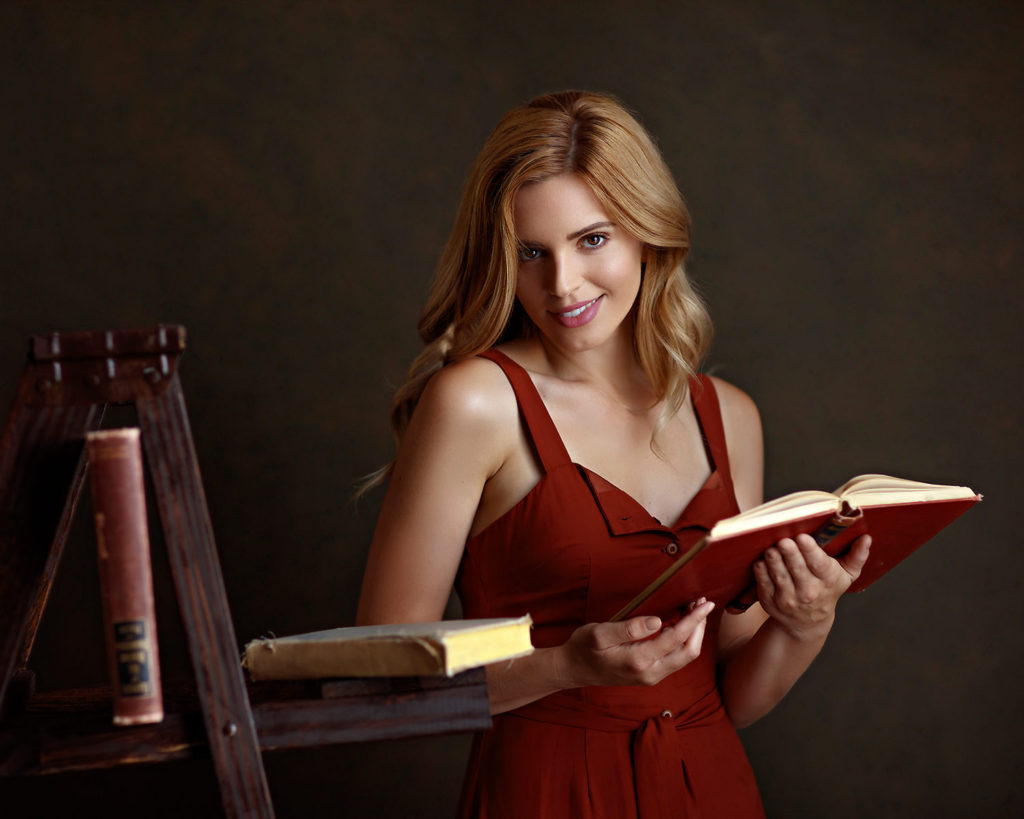
One of the most typical errors novices make is forgetting about the arms and hands. The subject’s hands are probably the most tricky to master, but also one of the most important.
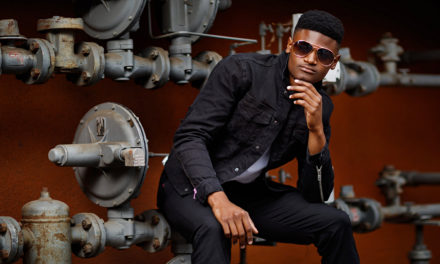
Having some basic knowledge about posing the upper body and hands will give you the confidence to get those creative magazine-cover portraits.
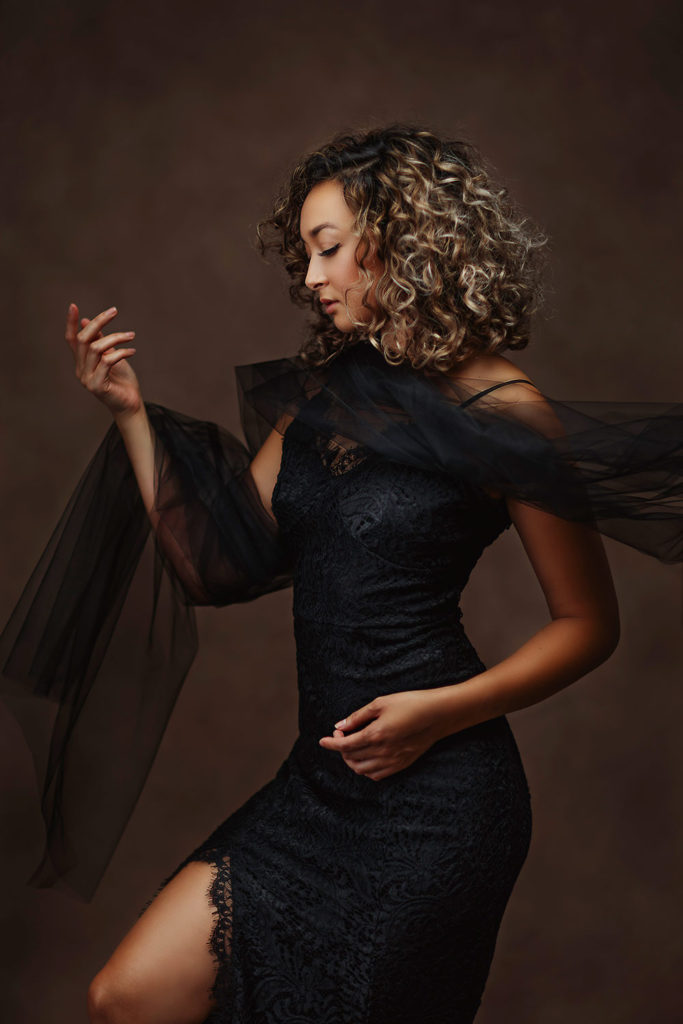
Upper body and hands posing
Camera: Canon EOS 5DS R | Lens: Canon EF 85mm f1.2L II USM
f/1.8, 1/1250s, ISO 50 | Photo by © Sergey Bidun
Light: Profoto B1 500 AirTTL System
LIFTING THE ARM
You have to pay attention to the subject’s arms for the half-body and full-body shots. When people stand naturally, they usually stand with their arms flat at their sides. This pose is not flattering and makes them look awkward and uncomfortable in the photo.
Standing in this pose will make their arms press against the upper body. The forearm gets squished, which in turn makes the arm look larger than it truly is. Having arms hang straight down to the sides will also make them seem longer than they are.
A simple and effective way to correct this is to have your subject lift their arm a couple of inches. This way it’s not pressed against the body and is more in a floating form. Ask your client to move the shoulders back – this will create a better posture for them and a slimming effect.
Another great way to pose the arms is to put one or both hands on the hips. For this pose, also watch out for broad shoulders and stuck out elbows.
In women portraiture, it’s essential to pose them in a graceful and feminine way. Always have your subject push the shoulders back and tuck the elbows in, without forearm pressing against the torso.
Lifting the Arm
Camera: Canon EOS 5DS R | Lens: Canon EF 85mm f1.2L II USM
f/2.0, 1/100s, ISO 125 | Photo by © Sergey Bidun
Light: Profoto B1 500 AirTTL System
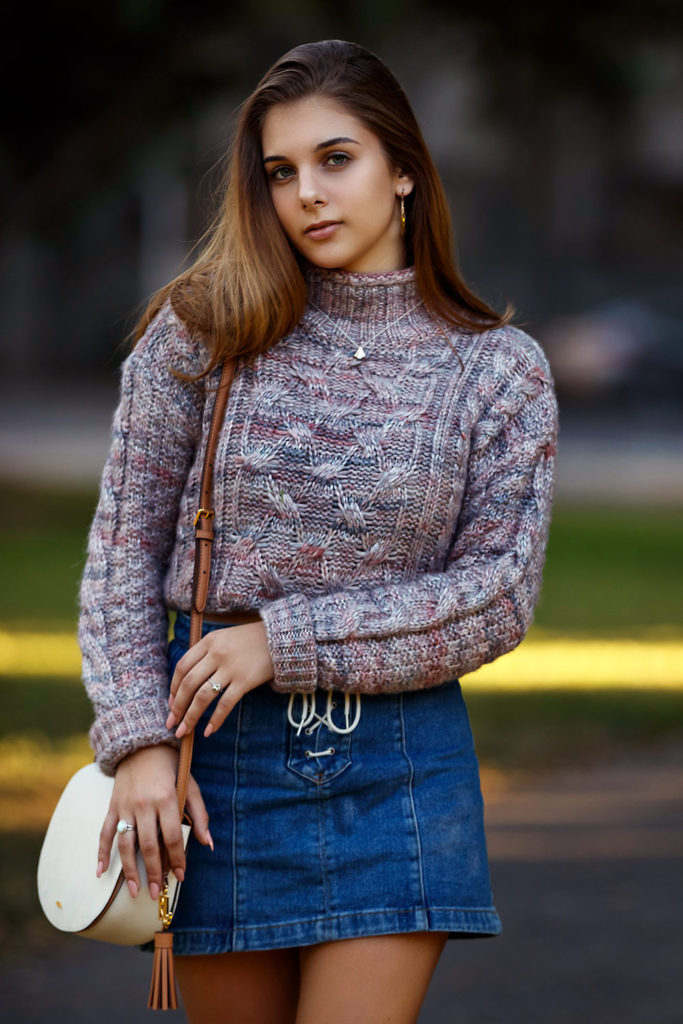
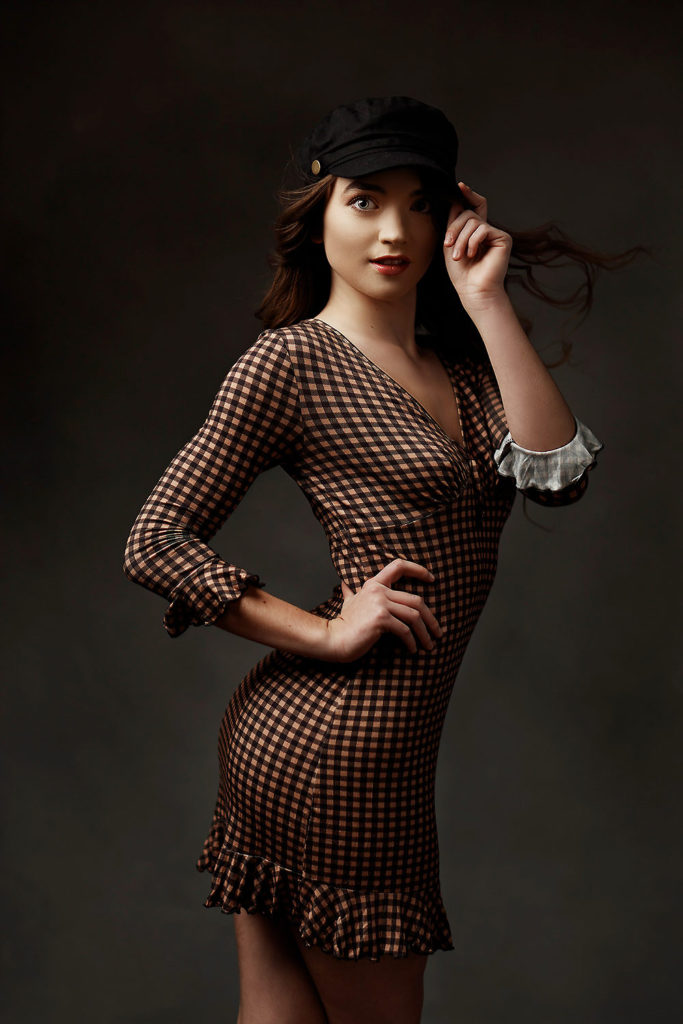
CREATE SPACE BY THE WAIST
Create space between the subject’s arms and torso. This is an excellent way to accentuate the waist and works for people of all body types. Try to keep the arms separate and slightly flexed, for the best portrait pose.
One of the simplest ways is to have your subject put their hands on the hips in a relaxed style – this will create a significant separation between the limbs from the body. Try working with different angles and having your subject adjust the hands until you get the shot that you are looking for.
A tactic that I often use in women and senior photography is having the subject pop their hip and shift the weight to the back foot. Learning how to pop your hip is not something everyone can do. As a photographer, you need to be able to visually show this pose yourself, so it’s easier for the subject to achieve.
Once the subject is able to pop the hip, this will be a significant advantage for a great shape. Have them slightly cross the knees, as it will emphasize that ‘S’ figure with it.
Pop the hip
Camera: Canon EOS 5DS R | Lens: Canon EF 85mm f1.2L II USM
Window Light | f/1.2, 1/1250s, ISO 500 | Photo by © Sergey Bidun
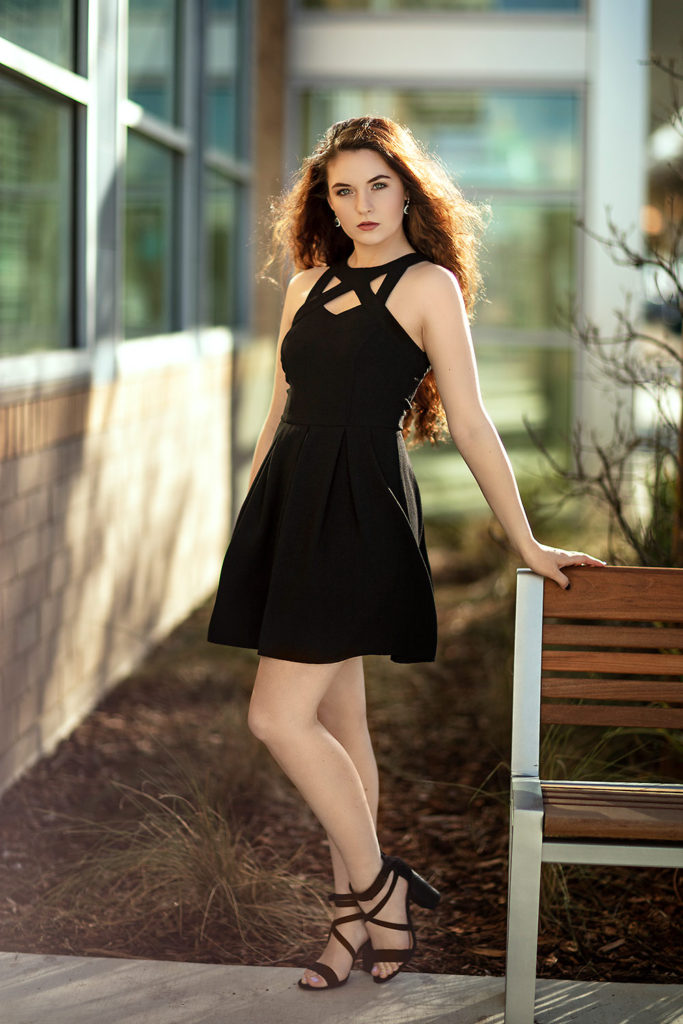
SHIFT WEIGHT TO THE BACK LEG
For more flattering full-body poses, try to position your clients in a way that puts their weight on their back foot. This way, there is one leg in the front, and the whole body is slightly leaning to the front.
It also creates a slimming effect for the subject. Posing the person this way will align the hip and shoulder track and give them a more comfortable posture.
This type of posing technique might not work for all body types. But whenever possible, try to experiment with variations of this position, for more flattering magazine-cover portraits.
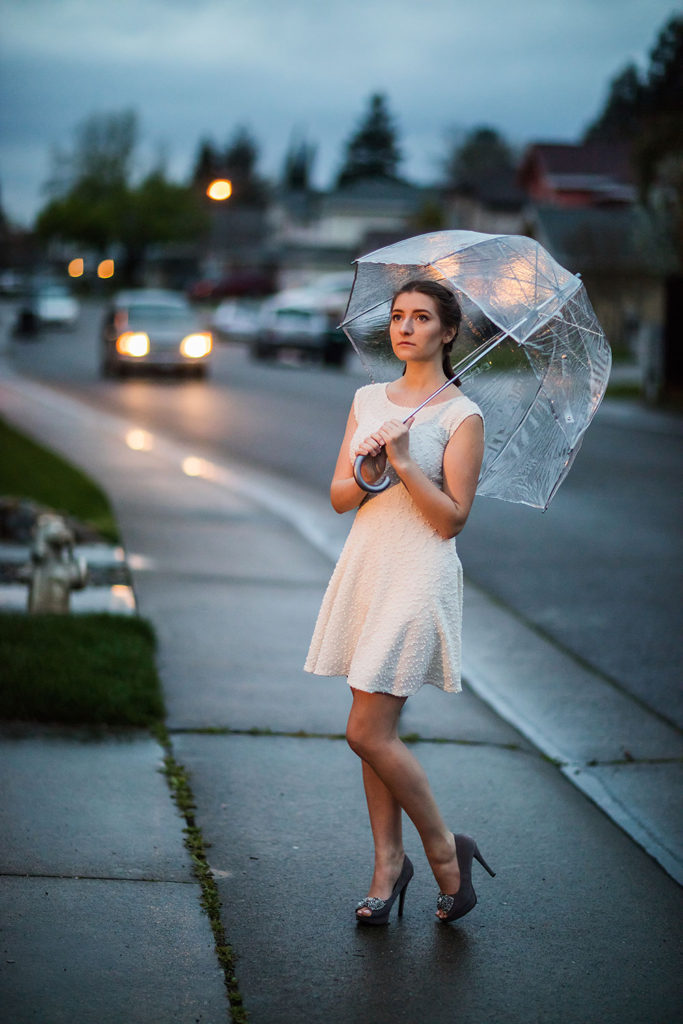
Shift weight to the back leg
Camera: Canon EOS 5DS R | Lens: Canon EF 85mm f1.2L II USM
f/1.2, 1/2000s, ISO 1250 | Photo by © Sergey Bidun
Light: Profoto B1 500 AirTTL System
CONCLUSION
This summarizes all of the primary points that I wanted to share with photographers who are looking to improve their portrait photography posing.
Communication is a vital part of any photo session. Your client will trust you completely if they know why you are positioning them a certain way. Spend enough time getting to know your subject and the images they are looking to get from this shoot.
As a professional photographer, you must understand how to pose your subject. You must be able to direct the angle of the subject’s body toward the camera.
The best way to learn the angles and curves of the body is to try these poses on yourself in front of a mirror. Once you have mastered the basics, it will be much easier to show these poses to your clients.
Having this knowledge will allow you to work more effectively and take magazine-quality shots, which will benefit both you and your client. You will feel a lot more confident during your photoshoots.
Now all that is left is get out there and practice practice and practice! I hope you found these posing tips valuable and will implement some of them during your portrait photoshoots.
IF YOU FOUND THIS POST HELPFUL AND INFORMATIVE PLEASE SHARE IN YOUR SOCIAL MEDIA.
Photographer: Sergey Bidun
Written by Maria Bidun
Beautiful blog. Thanks.
Thank you so much, I appreciate your time!
A lot of useful information. Thanks for sharing!
Thank you for your reply, I’m glad you found useful info for yourself!
Great Tips Sergey!
Funny, but based on your name I figured you might be located in Eastern Europe. I’m an American now living in Italy. But the photo above, “hair in front of the shoulders”, I thought “that photo looks like it was taken in front of the Delta King in Old Sacramento, CA! Where in Europe did he find this location?” (I moved from the Sacramento area, where I lived for over 25 years. Served in 2006 as the president of PPSV.). Then I scroll down and see you’re located in Sacramento!
Anyway, VERY nice work! And thanks again for the tips!
Thank you for checking out my post and leaving your feedback, Nathan! Wow what a small world, I’m so surprised! I’m originally from Ukraine, but have been living in California since 1998 and have been a photographer since 2007 🙂 Thank you for finding my articles and tips helpful.