How can the butterfly lighting technique be used in portrait photography?
Every photographer knows that light is the primary tool in creating a beautiful high-quality portrait. But how do you know which light setting to use for each specific photoshoot?
With so many light sources and different lighting setups, how is the photographer able to choose the ideal setting for a perfect portrait? This kind of questions I often hear from beginner photographers who are just getting into photography.
Photography Lighting is a vast topic, so today, we will discuss one type of light set up – the Butterfly Light. Follow along as we explore the basics of butterfly light and how you can implement it to improve your photography.
This post may include affiliate links. Please read our disclosure policy. [025]
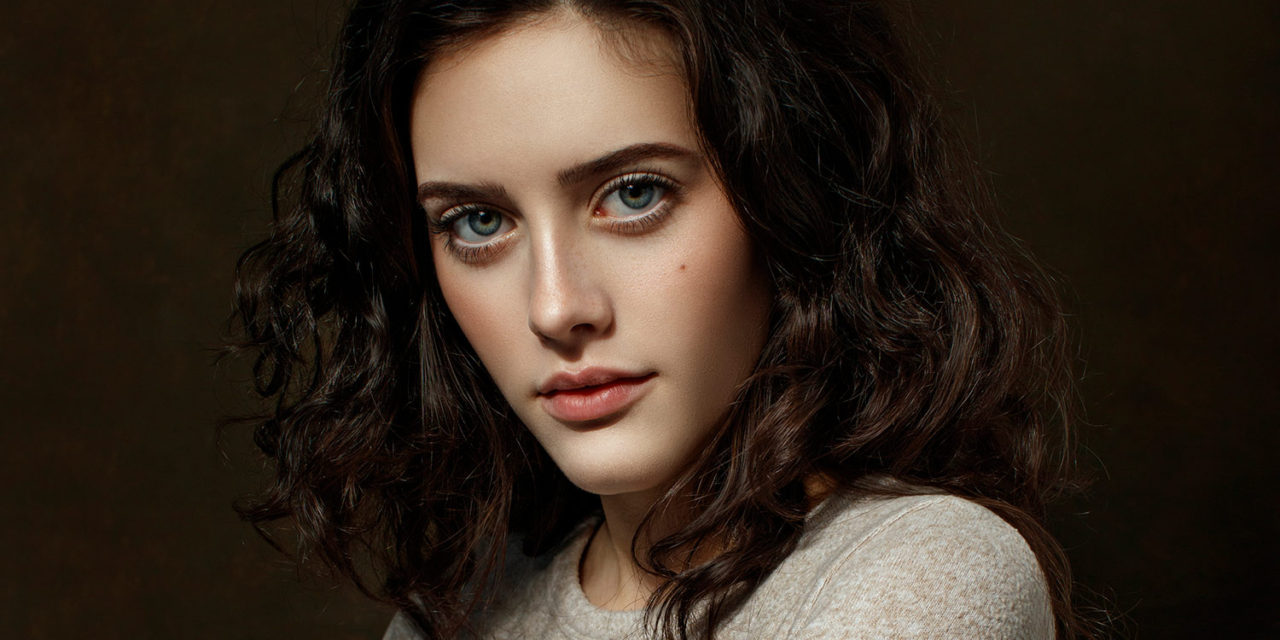
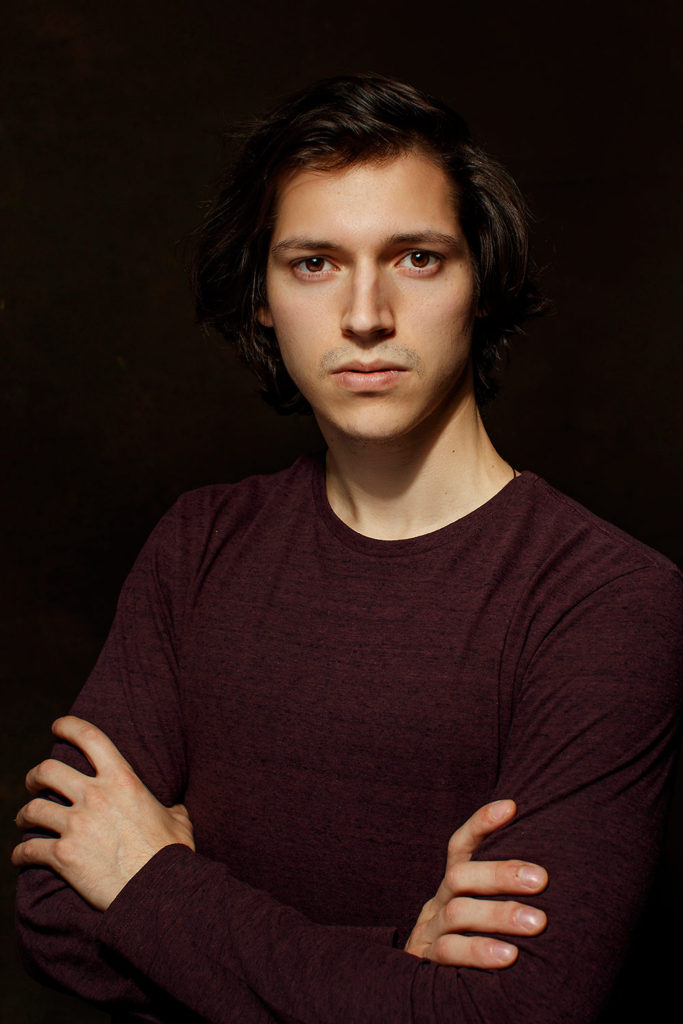
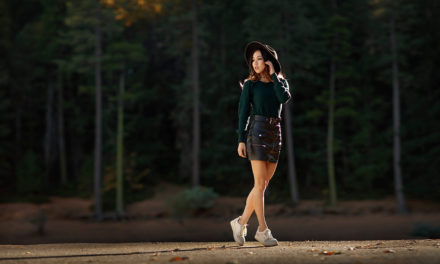
Camera: Canon EOS 5DS R | Lens: Canon EF 85mm f1.2L II USM
Nigh Street Light | f/1.6, 1/200s, ISO 500 | Photo by © Sergey Bidun
HISTORY OF THE BUTTERFLY LIGHTING
Butterfly lighting setup dates back to first glamour photography. It is one of the most flattering light settings for women portraits.
Butterfly lighting highlights the main facial features and adds a beautiful shadow under the chin, which adds a slimming effect.
Butterfly Lighting – also called Paramount Lighting – is the type of light that is named after Paramount movie studio of old Hollywood. It is also known as the butterfly, Hollywood, or glamour light.
This is a soft and feminine key light directed right at the model’s face from an angle above. The light allows model’s skin to be idealized as much as possible. This lighting setup is often used in Fine Art Portrait Photography.
Butterfly light creates the same flattering features as flat lighting but includes shadows underneath the nose and chin. You can use a reflector from below as a fill light in the chin area.
Butterfly lighting is commonly used in beauty shots and high-end portraits requiring soft, flattering light like glamour or fashion shoots.
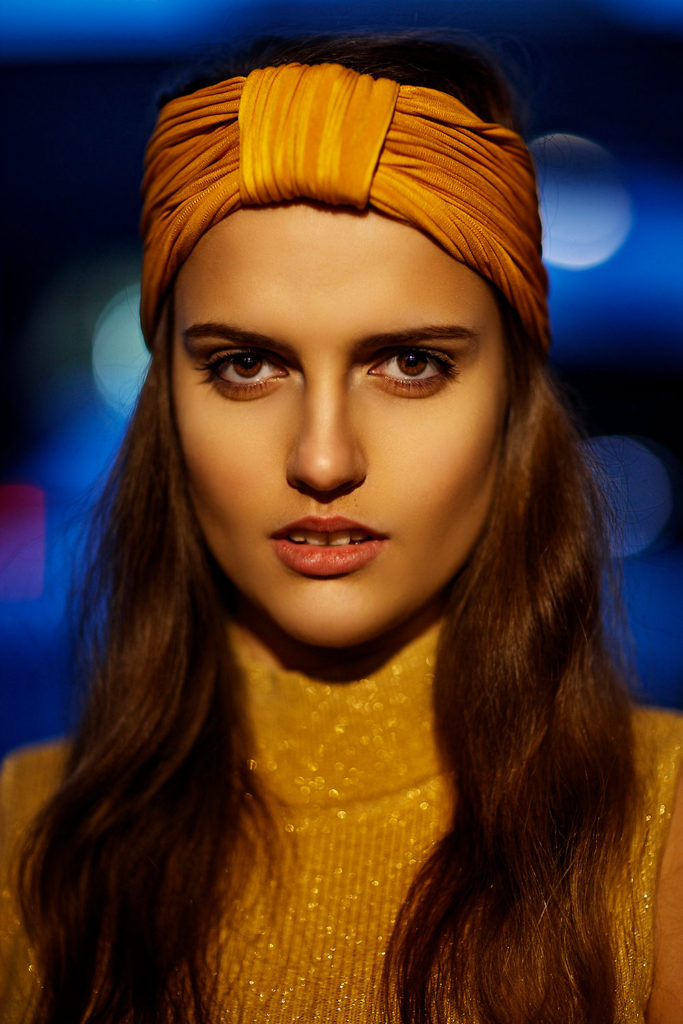
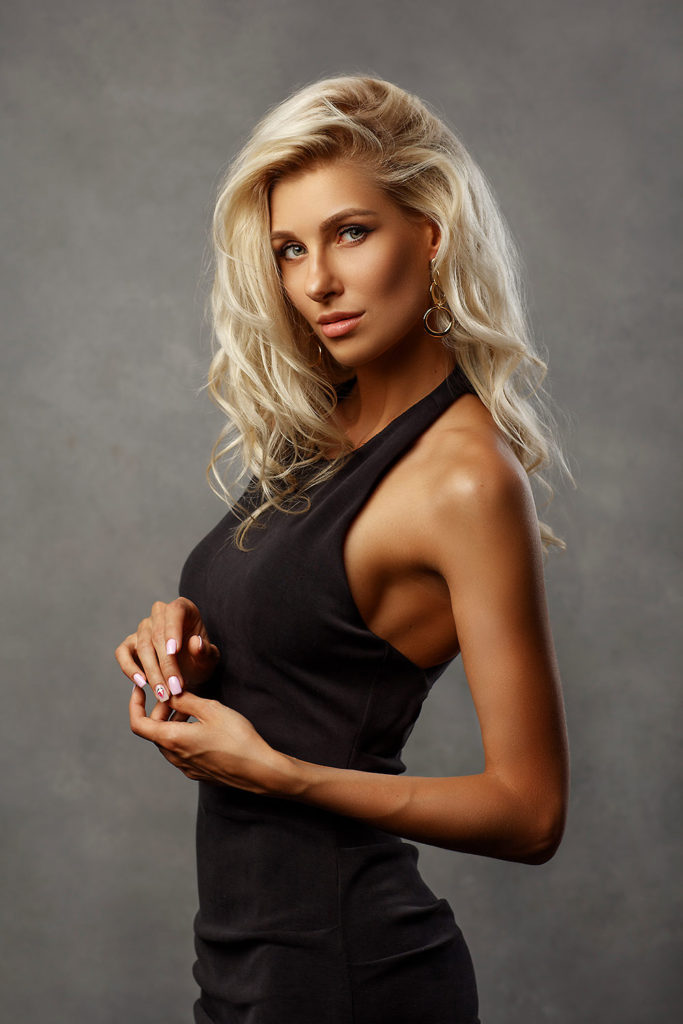
Camera: Canon EOS 5DS R | Lens: Canon EF 85mm f1.2L II USM
f/10, 1/200s, ISO 160 | Photo by © Sergey Bidun
Light: Profoto B1 500 AirTTL System
PHOTOGRAPHY GEAR NEEDED FOR BUTTERFLY LIGHTING
Let’s discuss what photography equipment is needed for creating a butterfly lighting setup. You will need a camera, a quality key light, and a reflector – it’s a pretty simple setup.
KEY LIGHT
The butterfly lighting pattern can be created with any light source: Strobe, Speedlight, continuous light, and even sunlight. Natural light is pretty impossible to control, and it’s harder to modify the placement and power of the light.
Most butterfly lighting setups involve some artificial light. My preferred key light for studio portrait photoshoots is Profoto B1 Monolight – it’s pretty simple to use and is a high-quality light.
MODIFIER
When working with a flash, photographers often add a modifier to help soften and diffuse the light. Modifiers differ in their size and the way they diffuse the light.
Some of the most commonly used modifiers are a beauty dish, a softbox, or an umbrella. I like to use a Profoto beauty dish as a modifier to make the light softer and more pleasing in photographs.
TRIGGER
Don’t forget to get a set of good quality triggers for your flash. Choose triggers that are compatible with your flash unit to avoid any problems during the photoshoots.
A lot of times, off-brands can be a better value, but in the end, they won’t work with your flash unit. I’ve used my Profoto triggers for a few years, and they work really well.
STAND
To make sure you can position your flash at the right angle for the butterfly lighting, you will need to put it on a stand. Make sure it’s a pretty sturdy stand which won’t tip easily. The stand needs to be strong enough to hold a flash and a modifier. I like working with Matthews heavy-duty stands – they are very sturdy and can be multi-use.
When searching for a perfect flash, keep in mind that it has to be compatible with your camera model. Triggers must also be compatible with the flash unit and camera model. This is very important.
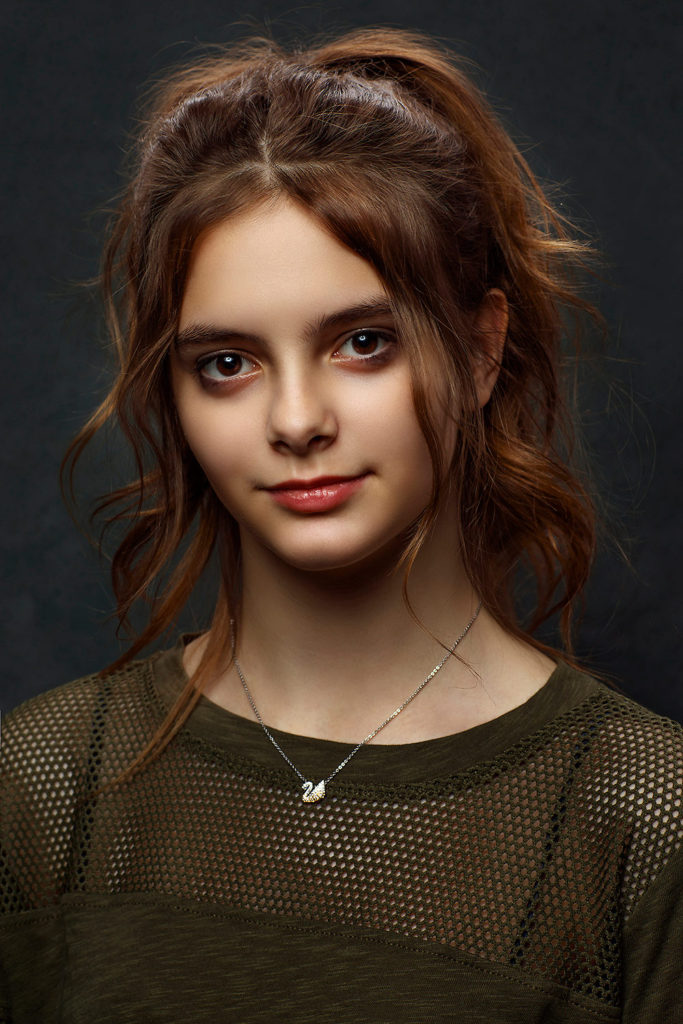
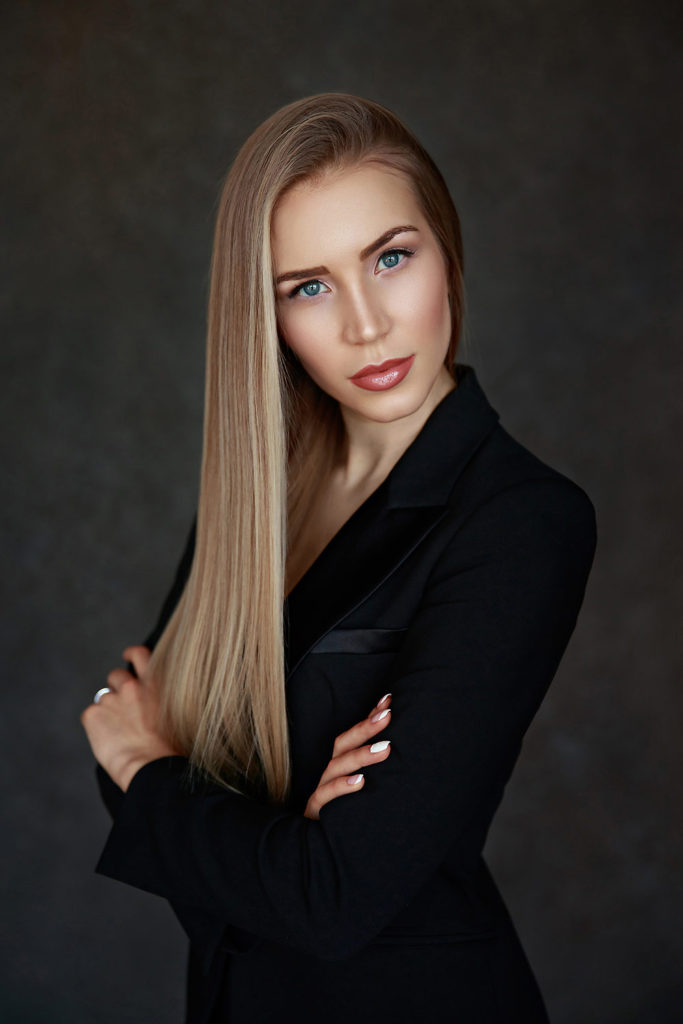
Camera: Canon EOS 5DS R | Lens: Canon EF 50mm f/1.2 L USM Lens
f/5.0, 1/200s, ISO 250 | Photo by © Sergey Bidun
Light: Profoto B1 500 AirTTL System
REFLECTOR
After key light and modifier are set up, you’ll find that there are strong shadows beneath the subject’s chin. A reflector held under the model’s chin, angled toward the face, will soften this shadow and give your subject a pretty glow. The closer your reflector gets to the subject, the softer the shadows will be.
A reflector is a great tool to balance the light. I recommend looking for one that is double-sided – with a different finish on each side. Usually, you will have one side that is white and the other one silver or gold metallic. Typically I work with the white and silver side of the reflector, depending on if I’m working with warmer or cooler tones.
During the photoshoot, you can have the model hold the reflector below the chin or at the waist level. It’s very lightweight – sometimes photographers hold it with one hand while shooting with the other.
A great benefit of using a reflector is the formation of beautiful catchlights in the model’s eyes. Watch out so that your subject doesn’t lower their chin too much – this will cause them to lose the catchlights in the eyes.
Catchlights add a unique feel to the portrait, and you don’t want to miss that by positioning your subject in the wrong way.
Find out How to Highlight Eyes in Portrait Photography for achieving more striking images.
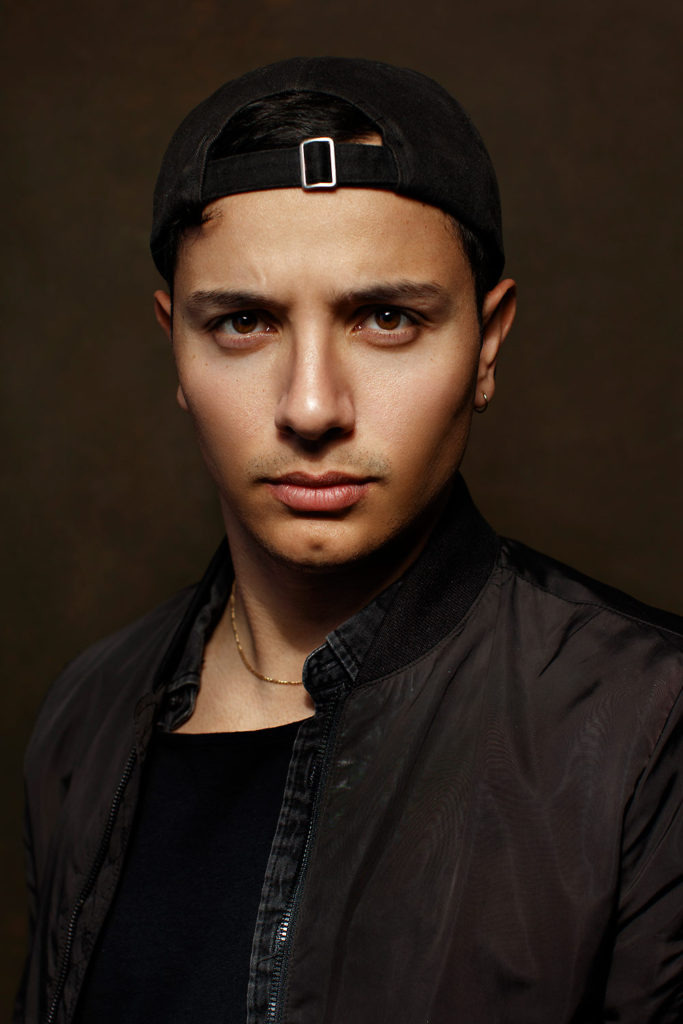
Camera: Canon EOS 5DS R | Lens: Canon EF 50mm f/1.2 L USM Lens
f/8.0, 1/200s, ISO 250 | Photo by © Sergey Bidun
Light: Profoto B1 500 AirTTL System
CAMERA AND LENS
You can use any DSLR or mirrorless camera for portraits with a butterfly lighting setup.
As for lenses, I would suggest using any lens 50mm and up. If you pick a wider lens such as 35mm, some distortion is starting to appear.
My favorite portrait lenses for studio portraits are Canon 50mm 1.2 and Canon 85mm 1.2. However, I also like using a telephoto lens Canon 70-200mm 2.8, as it gives the least amount of distortion.
If you want to use a telephoto lens, make sure the studio space allows you to move back and focus. It’s also a good idea to put the camera on a tripod at this point.
Camera: Canon EOS 5DS R | Lens: Canon EF 85mm f1.2L II USM
f/5.6, 1/200s, ISO 125 | Photo by © Sergey Bidun
Light: Profoto B1 500 AirTTL System
HOW TO SET UP BUTTERFLY LIGHTING PATTERN
The name Butterfly Light comes from the way shadow falls on the subject’s face. With this lighting setup, a shadow in the form of a butterfly appears under the nose of the model, as well as shadows under the chin.
For the Butterfly pattern, the key light source must be placed directly behind the camera and slightly above the eye level of the model. The photographer is right under the light source.
You can suggest a flattering pose for the subject, but pay attention that their face is positioned straight towards the light source. We are looking to achieve the butterfly lighting effect here.
You may want to add a reflector as a fill light to soften the shadows under the chin. If using a reflector – place it under the chin of the model, approximately at their waistline. Practice shooting with a reflector at a higher and lower angle to see the difference it makes on the final image.
Butterfly lighting suits well for people with pronounced cheekbones and a thinner face. With a round or full face, a loop light or another lighting setup is more suitable.
If working only with window light, it’s much harder to model a butterfly lighting pattern. A harsher light source like a strobe flash or the sun is required so that the shadow under the nose is more expressive.
There are many benefits of using butterfly lighting in the studio. The main one is that it allows the photographer to achieve a soft, diffused light on the model with relatively minimal and simple equipment.
Camera: Canon EOS 5DS R | Lens: Canon EF 85mm f1.2L II USM
Window Light | f/2.8, 1/400s, ISO 640 | Photo by © Sergey Bidun
CONCLUSION
Butterfly lighting pattern is simple but flattering. When you are still learning about light and different lighting setups, it’s great to start with the butterfly lighting as it doesn’t require a lot of equipment.
The good thing is that you don’t need a studio to be able to experiment with butterfly lighting. Bring your flash and a reflector and start practicing. You will have this lighting pattern mastered in no time!
Whenever you are shooting, remember that all people are unique individuals. There is no template pattern for arranging light.
You, as the photographer, must be able to know which lighting will look most flattering for your subject. Whether it’s Butterfly lighting, Rembrandt lighting, Split lighting, or the Loop lighting – the photographer should be able to pick a setup that works best for each face type.
If you are looking for a fine art portrait photographer in the Sacramento area, see my portfolio here.
IF YOU FOUND THIS POST HELPFUL AND INFORMATIVE PLEASE SHARE IN YOUR SOCIAL MEDIA.
Photographer: Sergey Bidun
Written by Maria Bidun
![Black and White Portrait Photography [Ultimate Guide]](https://bidunart.com/wp-content/uploads/2020/04/Portrait183a-440x264.jpg)