
When I got my first camera a while ago, landscapes, nature, and macro were the first things that I photographed. After every nature photoshoot that I did, I fell more and more in love with landscape photography. Besides the ability to disconnect from the hectic everyday life, landscape photography showed me a great way to spend time outdoors enjoying the surrounding beauty of nature.
Even after I got into portrait photography on a full-time basis, landscapes have always been super fascinating for me. Whenever I get a chance to travel to a unique location, I don’t pass up that opportunity.
The genre of landscape photography can involve hours or even days of traveling, and there are different types of photographers. Some strive to become a full-time professional, while others want to do it only as a hobby.
Despite your intentions, there are certain tips that will help to improve your landscape photography.
In this article, we will discuss ways to take your nature photography to the next level. Here are the tips that will help you choose the right location, time of day, and envision the shot before you click the shutter of your camera.
Follow these top landscape photography tips and start taking breathtaking and spectacular landscape photographs each time!
This post may include affiliate links. Please read our disclosure policy. [007]
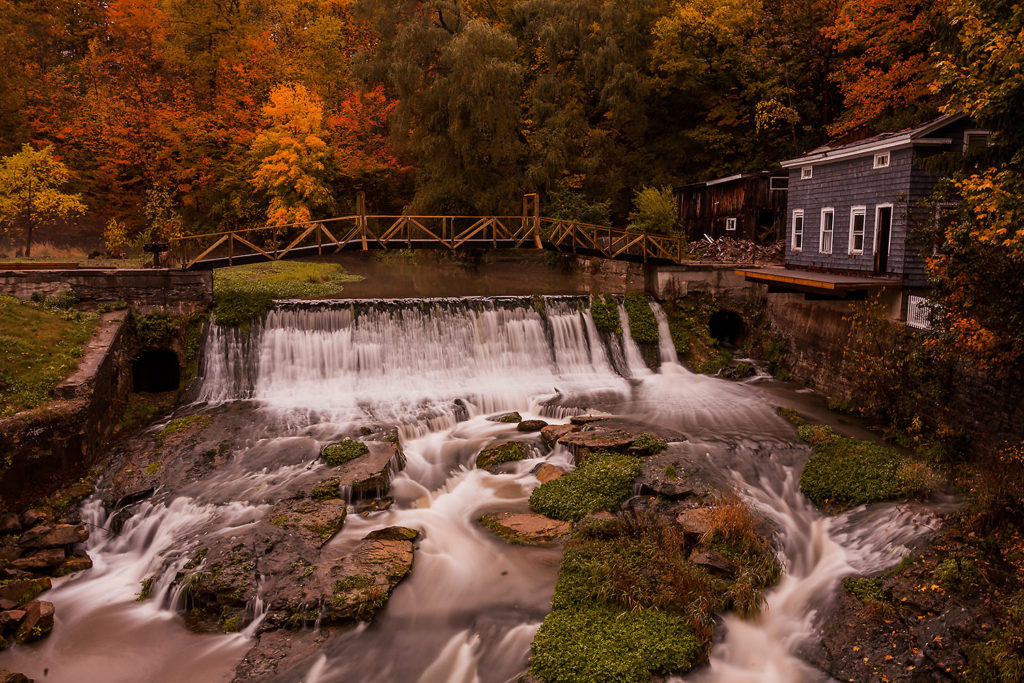
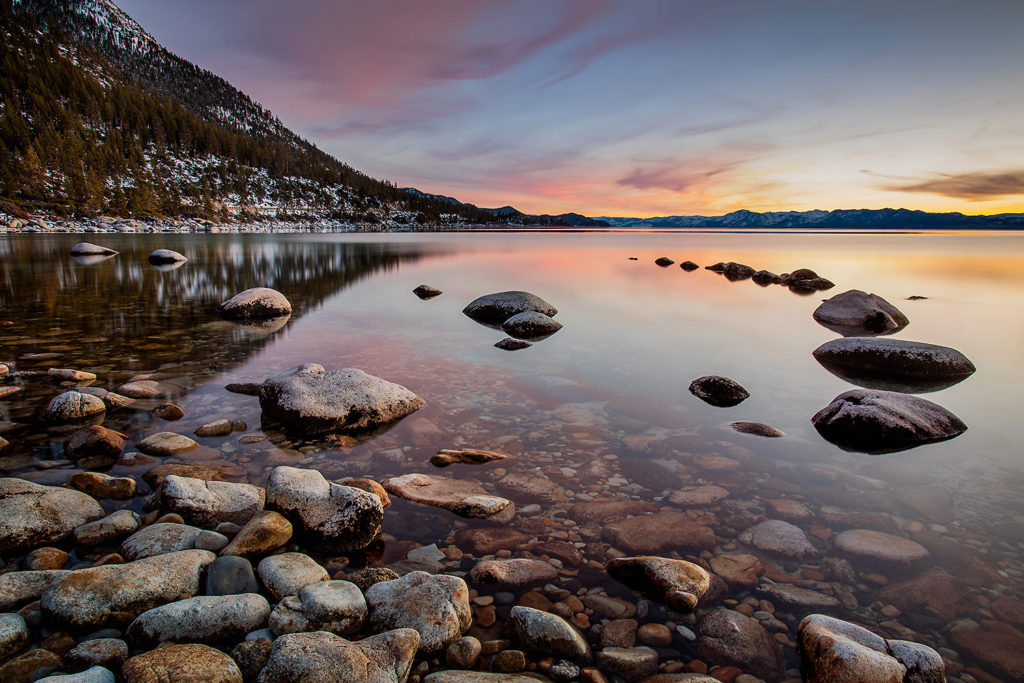
Camera: Canon EOS 5D | Lens: Canon EF17-40mm F/4L USM |Lee ND Filters
Natural Light | f/16, 10s, ISO 100 | Photo by © Sergey Bidun
1. LOCATION
With landscape photography, there is a lot of planning involved, at times, even more planning than the actual process of photography. It’s always best if you have a clear idea of where you are planning to go, and at what time of the day, to be able to capture the best photograph. This can be done with smartphone apps, or even scouting the area beforehand, if possible.
Learn how to read maps in case the navigation system stops working. Have a compass on hand, and understand how you can utilize these tools to find the perfect location. When you research and thoroughly plan your exact location, you will be able to get the best outcome from your photoshoot. Plan to arrive at your set location ahead of time, this will ensure that you won’t miss the desired golden hour.
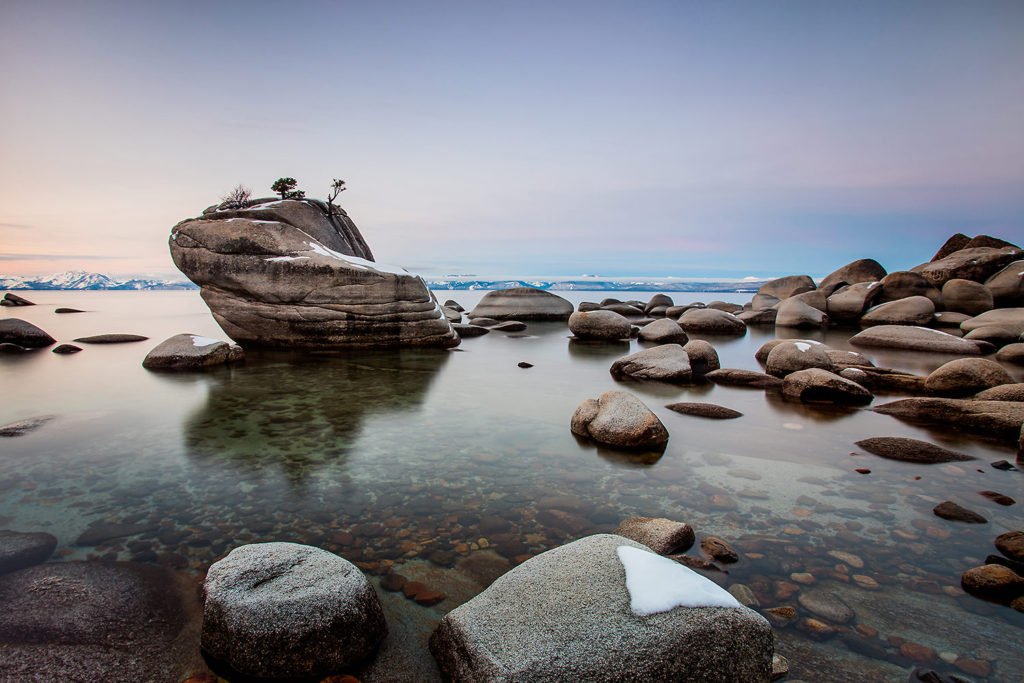
Camera: Canon EOS 5Ds R | Lens: Canon EF17-40mm F/4L USM
Natural Light | f/16, 30s, ISO 50| |Lee ND Filters
Photo by © Sergey Bidun
2. TIME
Golden hour time is famous for its soft and colorful tones and is perfect for impressive landscape photography.
The light in the hours after the sunrise and before sunset is ideal for creating beautiful landscapes, but keep in mind that some locations might not fall into this category. Sometimes mountainous places or photographing in a canyon might not provide you with the beautiful light during the golden hour. Do some research about visiting different specific nature locations.
Choosing the perfect time also depends on the season when you are photographing the landscapes and the type of weather. You can get gorgeous sunset after a stormy day, the kind of tones and colors that would never be present on a regular weather day. I’ve witnessed this many many times, sometimes wishing why I don’t carry a professional camera on me all the time.
When you are planning your next trip to nature, I suggest learning when the ideal light will hit the scenery you’re planning to photograph.

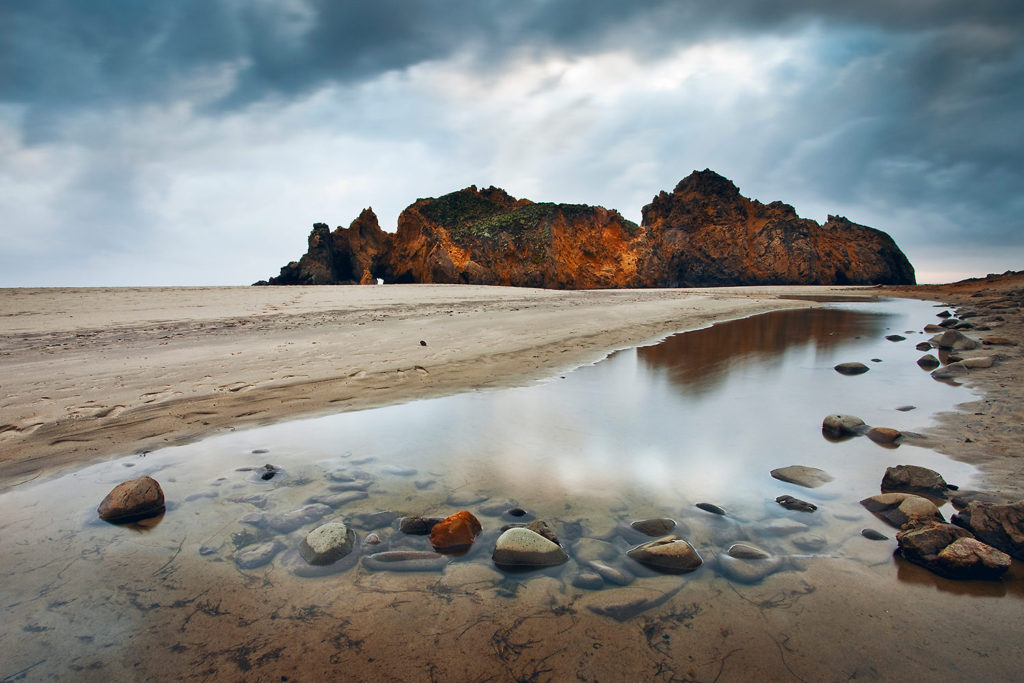
Camera: Canon EOS 5Ds R | Lens: Canon EF17-40mm F/4L USM
Natural Light | f/22, 5sec, ISO 50| |Lee ND Filters
Photo by © Sergey Bidun
3. COMPOSITION
You should always strive to get your image composition right when taking the photo, rather than to rely on post-production. There are several methods that you can use to help your composition, such as the rule of thirds.
To better imagine the rule of thirds that photographers always refer to, you can visualize a screen divided into nine even squares by two horizontal and two vertical lines.
Some photos will look great with the focal point in the center square, but when you place the subject off-center at one of the intersecting points of the fictional lines, it will often create a more beautifully composed photograph.
A landscape image composed by the rule of thirds is usually more intriguing and pleasing to the eye. As a photographer, you need to train yourself to be able to see a scene and analyze it in your mind before starting to compose your image. The more you practice and experiment with your composition and angles, the faster you will begin taking gallery-quality breathtaking photos.
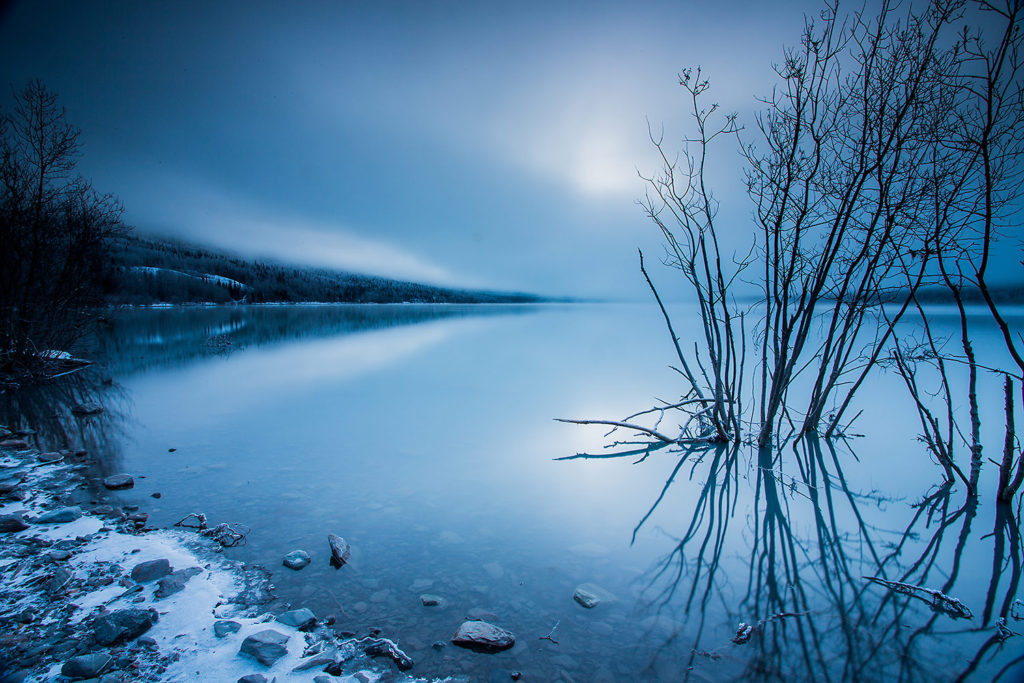
Camera: Canon EOS 5D | Lens: Canon EF17-40mm F/4L USM
Natural Light | f/22, 5sec, ISO 50| |Lee ND Filters
Photo by © Sergey Bidun
4. WIDE-ANGLE LENS
Wide-angle lenses are best for landscape photography and favored by many photographers. The perspective of the wide-angle lens tends to draw the attention of the viewer and adds a sense of depth.
These lenses can show a broader view, and as a result, give a sense of wide-open space.
The wide-angle lenses allow you to use faster shutter speeds since they allow more light, as well as give a greater depth of field. You can take an image at f/16, and it will make both the foreground and background sharp.
Depending on the location of your photoshoot, practice using different angles for more interesting landscapes.
Camera: Canon EOS 5D | Lens: Canon EF17-40mm F/4L USM
Natural Light | f/22, 36sec, ISO 100| |Lee ND Filters
Photo by © Sergey Bidun
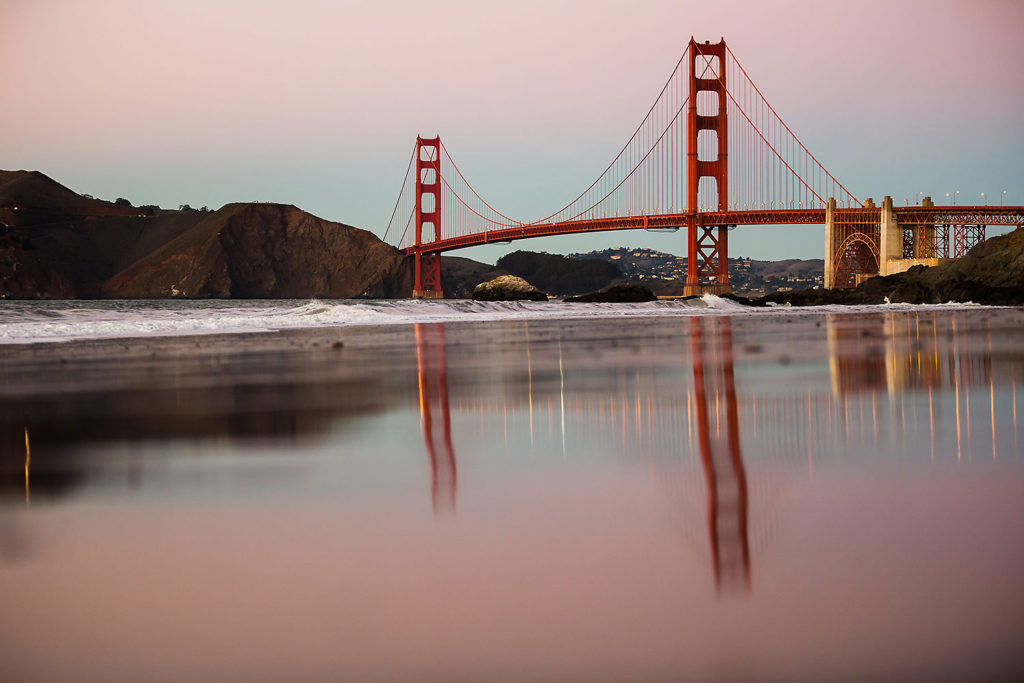
5. LENS FILTERS
Your landscape photographs won’t look as unique and appealing without the use of photography filters. In order to get the most beautiful images, you can make use of two different types of filters in your landscape photography.
Polarizing Filters
A polarizing filter is typically the first filter landscape photographers buy to instantly improve their pictures by adding richness and contrast to them. This filter is one of the fundamental tools in a landscape photographer’s gear bag.
If you are tired of getting bland colors in your landscape photography, you need polarizing filters that will help you get more vivid images. Polarizing filters darken the sky, instantly enhancing resulting photographs by increasing color saturation and contrast.
Graduated Neutral-Density Filters
I prefer using graduated neutral-density (ND) filters in my landscape photographs. Many scenes in nature contain a greater range of light than our cameras can record; therefore, ND filters are the tools for every landscape photographer.
The primary purpose of ND filters is to darken the background when it’s notably lighter than the foreground, and they prevent too much light from entering the camera. In an instance of sunny day golden-hour shoot when you have bright skies, but the foreground is in the shade – you would greatly benefit from ND filters.
Camera: Canon EOS 5Ds R | Lens: Canon EF17-40mm F/4L USM
Natural Light | f/13, 30sec, ISO 50| |Lee ND Filters
Photo by © Sergey Bidun
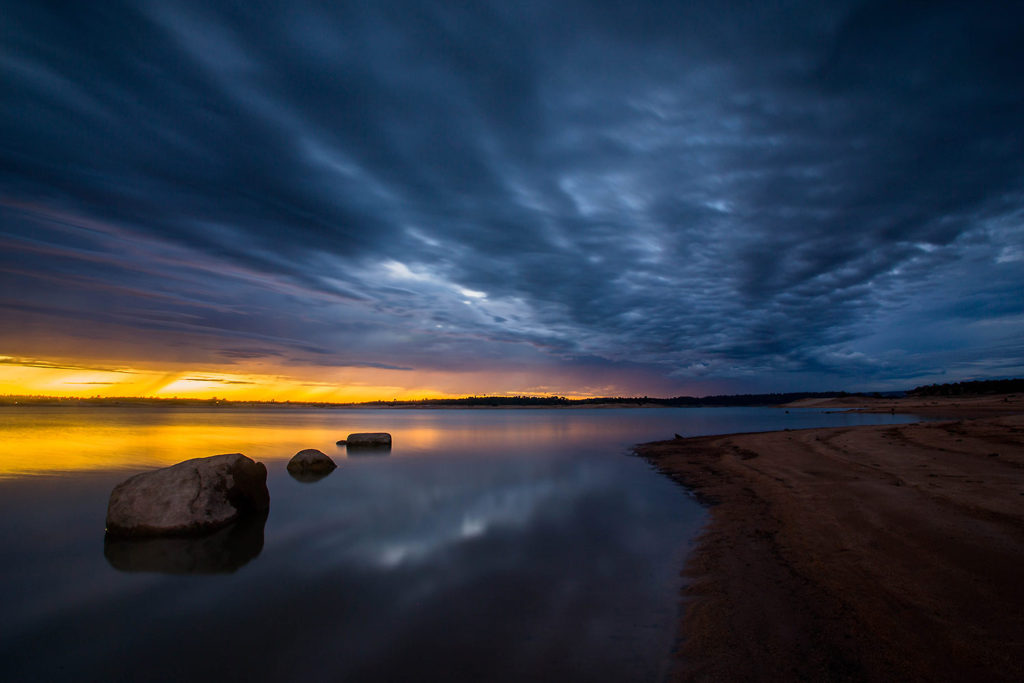
6. LONG EXPOSURE SHOTS
Long exposure shots are probably my favorite in landscape photography.
Rather than capturing a split second in time, a long exposure shot gives a viewer a chance to see what the landscape looks like over seconds, minutes, or even hours. These images are much more dynamic and powerful.
When looking to create a gorgeous long exposure image, the first step is to find a landscape that is favorable to this kind of photography.
Long exposures are ideal for portraying movement, so choose a landscape such as a waterfall, a river, waves crashing on the beach, or a starry night. Some of my most favorite locations to photograph long exposure shots are scenes with water and crashing waves.
If you are trying to capture the motion of water, you can create a gorgeous milky-white water effect by choosing a long exposure starting with 2 seconds and up.
You should always use a tripod for long exposure shots so that you can capture the movement of the water while having the rest of your image sharp.
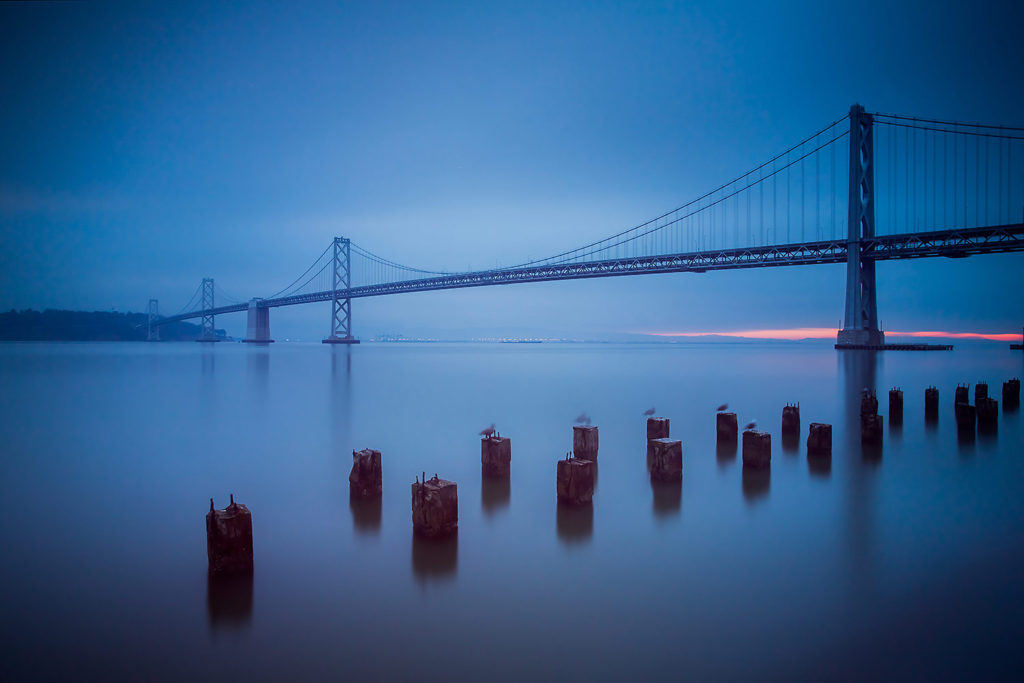
Camera: Canon EOS 5D | Lens: Canon EF17-40mm F/4L USM
Natural Light | f/13 450sec, ISO 200| |Lee ND Filters
Photo by © Sergey Bidun
7. USE A TRIPOD
A tripod is an essential piece of equipment for landscape photographers. If you want to capture the highest quality photographs at the best time of day, then a good quality tripod is a must.
Photography in low light conditions without a tripod would require an increase in ISO to be able to avoid camera shake. Doing so would create more noise in your images, and this is not what you want to see in your landscape shot.
If you want to capture a landscape using a slow shutter speed for a long exposure, without a tripod, you won’t be able to hold the camera steady enough to avoid blurred images from camera shake.
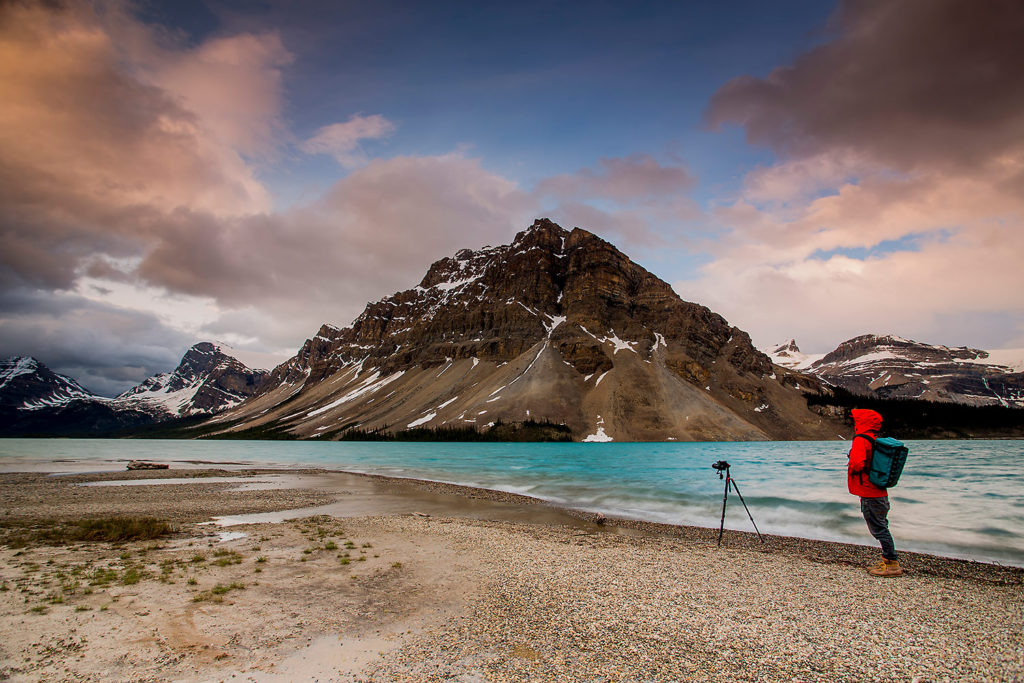
Camera: Canon EOS 5Ds R | Lens: Canon EF17-40mm F/4L USM
Natural Light | f/8, 0.8sec, ISO 50| |Lee ND Filters
Photo by © Sergey Bidun
CAMERA SETTINGS RECOMMENDATIONS
Here are some recommended camera settings for landscape photography at sunrise or sunset time:
Aperture: f/16
ISO: 100
SHUTTER SPEED: will depend on the available light and if you are using lens filters such as Polarized filters or Graduated Neutral Density filters.
If you are trying to capture the movement of water in a long exposure shot, you want to use the shutter speed as the primary setting, and adjust the rest of the settings accordingly. I would recommend starting with 1- second shutter speed and up, depending on how much motion you want to see in the water. I prefer to shoot in 30-sec and up.
Always use a tripod for landscape photography, for getting those crisp & sharp images.
Camera: Canon EOS 5D | Lens: Canon EF70-200mm f/2.8L IS II USM
Natural Light | f/2.8, 1/125sec, ISO 1000| |Lee ND Filters
Photo by © Sergey Bidun
CAMERA & EQUIPMENT
There are a few pieces of gear that are essential to a successful long exposure image:
CAMERA: Any DSLR or mirrorless camera body will work, as long as it has the capability for long shutter speeds, including bulb mode.
LENS: Landscape photographers prefer wide-angle lenses, which allows them to capture more of the scene. Here is the recommended lens for landscape photography:
Canon EF 16-35mm f/4L IS USM Lens
Sony Vario-Tessar T FE 16-35mm f/4 ZA OSS Lens
Nikon AF-S NIKKOR 16-35mm f/4G ED VR Lens
CAMERA SHUTTER RELEASE: A remote shutter release gives you the ability to press the shutter without actually touching the camera. Using this remarkable tool will reduce the chance of vibrations, which could ruin a long exposure photo. Here is an example of a camera shutter release:
Vello ShutterBoss II Timer Remote Switch for Canon
TRIPOD: Every landscape photographer must own a good quality tripod. By good quality, I mean carbon fiber, durable, and sturdy tripod that will remain still throughout the exposure. When choosing your tripod, pay attention to the size it folds down to for more comfortable transporting. Check out this good quality tripod by Manfrotto:
Manfrotto Befree Advanced Carbon Fiber Travel Tripod
LENS HOOD: In bright light conditions, you should always use a lens hood to prevent flaring.
ND FILTERS: I also recommend using a Graduated Neutral Density filter to even out the light in the sky for more even lighting.
Camera: Canon EOS 5D | Lens: Canon EF17-40mm F/4L USM
Natural Light | f/22, 15sec, ISO 100| |Lee ND Filters
Photo by © Sergey Bidun
CONCLUSION
Landscape photography is just like any other creative activity; practice makes the artist.
Once you learn and understand the fundamentals of photography, you will start getting much better photographs. By applying the tips discussed in this article, you will be well on your way of sharpening your skills as a landscape photographer.
Whether you are photographing nature as a hobby, or have a dream to make a living from it, keep practicing and experimenting with landscape photography. Practice with the composition, using lens filters, and experimenting with long exposure shots.
With learning and lots of practice, you will develop skills and be able to capture striking photos at the most amazing locations.
IF YOU FOUND THIS POST HELPFUL AND INFORMATIVE PLEASE SHARE IN YOUR SOCIAL MEDIA.
Photographer: Sergey Bidun
Written by Maria Bidun


