Do you ever wonder how a specific portrait photographer photoshoots and what their editing steps are? I know I do. I love learning new photo techniques and getting inspiration from talented photographers and artists.
Every photographer and artist has their own vision, style, and way of presenting their art. With acquired practice and experience, we all develop our own unique style of photography that will be unlike any other photographer’s style.
Nowadays, it’s relatively easy to find inspiration for portrait photography. We have access to lots of literature, cinema, and of course, many different sources of social media. All this information and sources of inspiration are accessible to anyone at no cost, which is very convenient for beginner photographers.
In this post, I’m going to share my steps for creating an outdoor natural light portrait. As I’m often asked which gear and camera settings I use, how I work with the given lighting, and how I process my images – this article might answer those questions in some detail.
Follow along as we discuss the steps I take, from photoshoot preparation and to the post-processing time.
This post may include affiliate links. Please read our disclosure policy. [014]
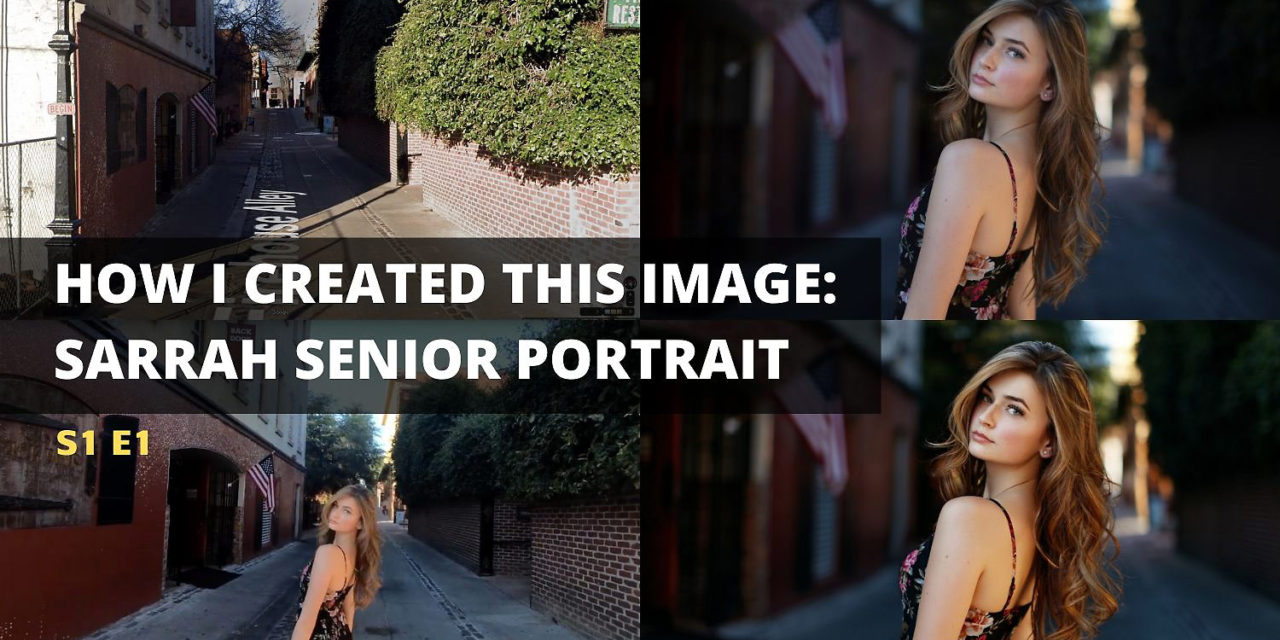
WHAT IS THE IDEA BEHIND THIS PORTRAIT
Senior photo sessions usually take place outdoors, as this setting gives more freedom for a lifestyle genre of photography. For this photoshoot, the idea was to get a good variety of half-body and full-height portraits, with a couple of outfit changes.
The main goal for any portrait photoshoot is to keep it maximum fun and at ease, and don’t over-control the situation. The more relaxed your subject feels the more natural their photos will look.
It’s important that your client is prepared and knows what to expect from their portrait session. As a senior portrait photographer, I share ideas and senior outfit suggestions on how seniors can better prepare for this special photoshoot.
HOW I CHOSE THIS LOCATION
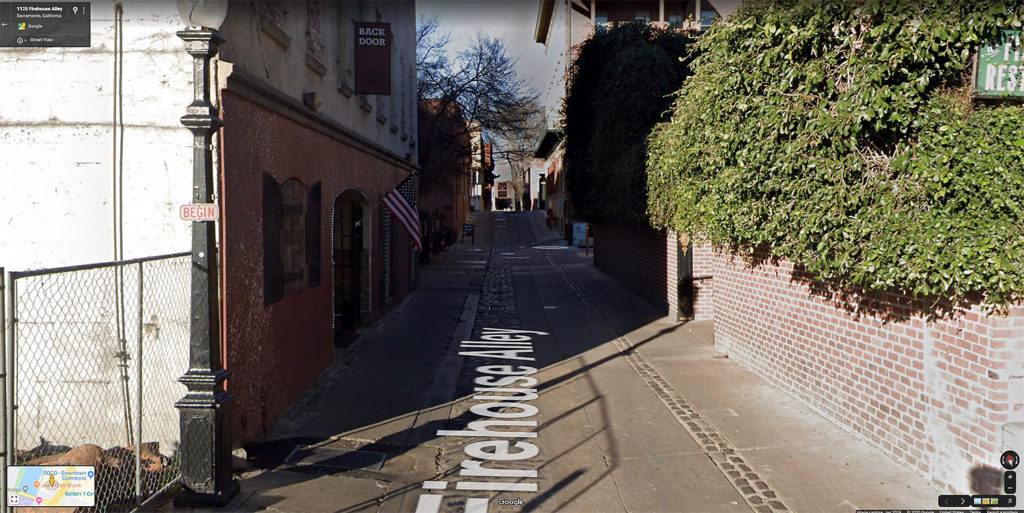
For this summer senior photoshoot, we wanted to choose a location that is a bit city, a bit rustic, or in between. Old Sacramento location is just that – a perfect combination of the old town with a rustic touch.
This place offers a great variety of different backdrops suitable for any photo session, including seniors, children, and family pictures.
Some of the spots where you can take amazing portraits in Old Sacramento include boardwalk, Delta King boat (with limited access), Train Depot, antique buildings, alleys, and lots of brick walls. This location gets pretty busy on weekends, so for a photoshoot, it’s best to go here on a weekday.
You can get a better feel of Old Sacramento location from the above Behind the Scenes Video with Sarrah.
THE LIGHTING SETUP
This senior portrait photoshoot took place in the summer, right before the sunset time. The golden hour is the best time for outdoor photoshoots, and that was our intention for this session.
We recommend reading our article Natural Light Photography for more tips on natural light sunset photoshoots.
The portrait that we are discussing was taken in an empty alley with brick-wall buildings on both sides. I’m always on the lookout for such locations as they give a pleasing tunnel look for the pictures.
Such locations are a great example of a compositional technique – leading lines. Portraits taken with leading lines technique help to bring the viewer’s attention to the main subject – the senior.
I chose this specific spot for this portrait since it doesn’t have directional sunlight.
Due to the tall building walls on the left and right side, we got soft natural skylight coming from one direction – above and behind me, as a key light source.
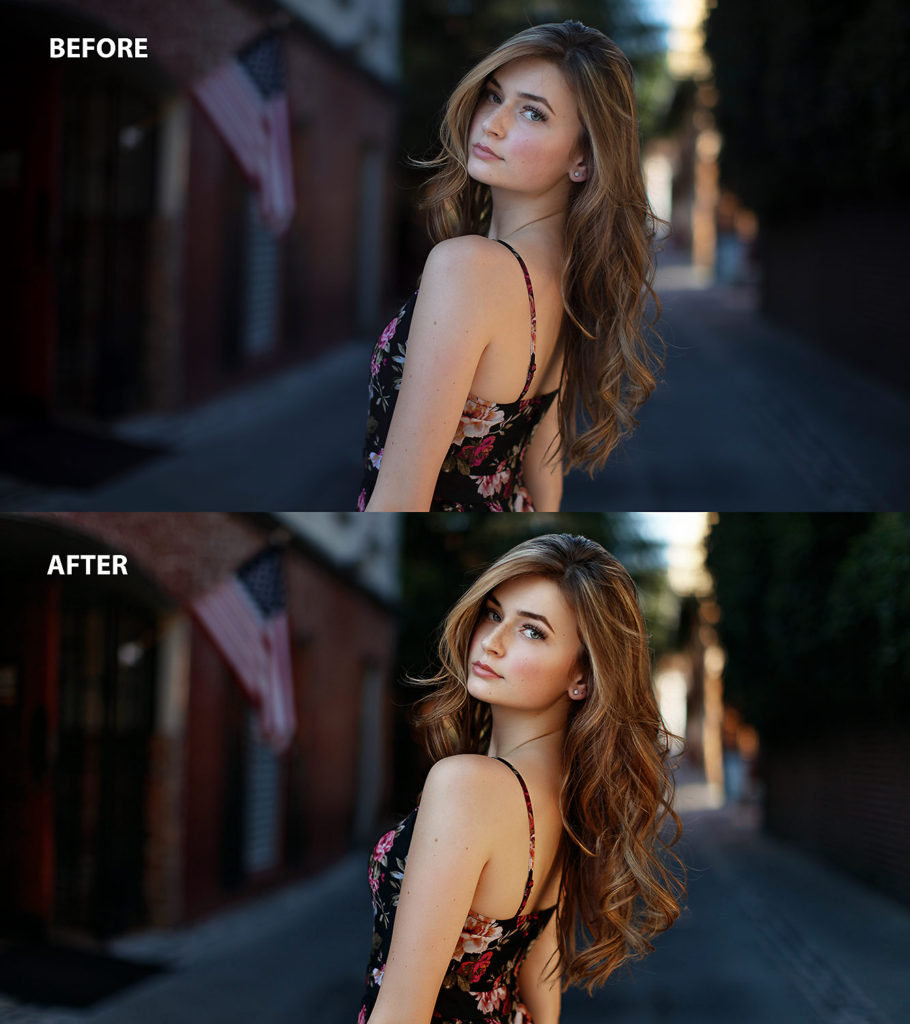
I’ve positioned the subject on the edge of the shadow line. This way she’s standing in the shadow while facing the open sky. The subject is illuminated by the sunlight being reflected from the pavement, which creates impressive fill light for this portrait.
This type of one-directional light is best for outdoor portraits, as it creates almost like the studio lighting. It’s one of my favorite natural light setups, and I’m always looking for this type of outdoor lighting.
The lighting in this portrait is pure natural sunlight; I did not use a reflector or a diffuser. The warm sunshine during this golden hour provided the perfect natural lighting setup for this senior picture.
HOW I POSE THE SUBJECT
In female portrait photography, one of the essential features is posing. If you are working with regular clients and not models, as a photographer, you must be able to direct your subject and help them with posing tips.
I recommend you to see our post on Posing Tips for Women Portrait Photography, where we discuss this topic in detail.
For this portrait, I asked the subject to turn her shoulder away from the camera, and she’s standing practically sideways to the camera. This is a good body position as it gives a slimming effect, which is very flattering for females.
Notice how her chin is slightly up and away from the neck – this is an excellent way to eliminate any double chins and shadows. Girl portraits will look much more flattering when you start using these little posing tricks.
Always pay attention to the hair. Make sure it flows nicely and doesn’t sit on the shoulders and looks awkward in the shot.
WHAT PHOTOGRAPHY GEAR I USED TO GET THIS SHOT
- Camera: Canon 5DsR
- Lens: Canon 50mm F1.2 L Lens
- Camera Bag: Lowepro Fastpack BP 250 AW II
WHAT CAMERA SETTINGS I USED FOR THIS SHOT
- F-stop 1.6
- Shutter speed 1/1000
- ISO 100
- Auto White Balance
- Manual mode
- RAW format
HOW I PROCESS AND EDIT IMAGES
My main rule in photography is to get the shot right during the photoshoot time and only do minimal enhancement during the processing time.
The truth is, if the image was taken at the right angle and using ideal lighting – there wouldn’t be much editing needed. I aim to get my cropping done during the photoshoot as well.
For the post-processing workflow, I used both Lightroom and Photoshop. I started with basic color correction in Lightroom and then uploaded the image to Photoshop.
Photoshop retouching steps:
- First, I started with the skin clean up using the Healing Brush tool and a Patch tool.
- Used frequency separation to smooth out the skin.
- Used local and global dodge & burn to increase shadows and highlights to make them pop and give dimension.
- Worked on color grading to make the colors pop by using Color Balance, Selective Color, and Hue Saturation.
- Added contrast to the image by using Curves.
- Increased sharpness and saved the image to the portfolio.
Don’t limit your creativity during post-processing time. It’s your art: do it your way.
Camera: Canon EOS 5DS R | Lens: Canon EF 50mm f1.2L II USM
Sky Natural Light | f/1.6, 1/1000s, ISO 100 | Photo by © Sergey Bidun
CONCLUSION
So this summarizes my steps on how I created this senior portrait with Sarrah.
My main suggestion for you is to try to get the maximum clean shot during the photoshoot, to reduce the processing time behind the computer.
If you are looking to get high-quality portraits or senior pictures, do not miss the opportunity to reserve your photoshoot with Sergey Bidun, a professional Sacramento portrait photographer. You can count on a great atmosphere during the shoot and high-end creative portrait photographs!
Let me know if you found this information useful, and if there is anything else you want to learn from me. Please leave your comments and feedback below; I look forward to reading them.
IF YOU FOUND THIS POST HELPFUL AND INFORMATIVE PLEASE SHARE IN YOUR SOCIAL MEDIA.
Photographer: Sergey Bidun
Written by Maria Bidun


